Simon has submitted the final builds of xdg-app to the debian archives:
https://anonscm.debian.org/git/collab-maint/xdg-app.git
So, pretty soon now you’ll be able to just do “apt-get install xdg-app” to get xdg-app in Debian!
Simon has submitted the final builds of xdg-app to the debian archives:
https://anonscm.debian.org/git/collab-maint/xdg-app.git
So, pretty soon now you’ll be able to just do “apt-get install xdg-app” to get xdg-app in Debian!
When I set out to create xdg-app I had two goals:
Yesterday I released version 0.5.0 of xdg-app, and which I now finally consider feature complete for the first of these goals. It now has tooling that makes it easy to build apps, it has multiple graphical frontends, and it is now pretty robust and featureful.
0.5.0 is already built in Fedora 23, and is available for other distributions here.
No software is ever finished obviously, so I will continue working on xdg-app. However, going forward the majority of my work will now be focusing on the sandboxing and portal aspects of xdg-app.
In the previous parts (1,2,3,4) we created various applications and tested them locally. Now we will look into how this application can be distributed to your users.
First we need to talk a bit about OSTree. This is the core distribution and installation mechanism of xdg-app. OSTree is similar to git, but has been designed to handle trees of large binaries. Just like git it has the concept of repositories, commits and branches (refs) . Branches are names which points to a commit id, and an application stored in a repository is such a branch.
On your machine there is a local OSTree repository which has a bunch of “remotes” configured. When you install or update an application from one on these remotes, what happens is that we ostree pull the branch from the remote, then do a local checkout of the branch (with hard links back to the repository files, so this is cheap).
The OSTree repositories created by xdg-app build-export are of a type (called archive-z2) that are meant to be served by a dumb webserver. So, to distribute your application, all you have to do is copy the repository to a webserver and give the url to your users.
There are however some extra details you have to be aware off .
First of all, the format of the archive-z2 repositories is one file per file in the app. This means a pull operation will do a lot of http requests. Since new requests are slow, make sure you enable support for HTTP keep-alive in your webserver.
OSTree also supports something called static deltas. These are single files in the repo that contains all the data needed to go between two revisions (or from nothing to a revision). Creating such deltas will take a bit more space, but will make downloads much faster.
xdg-app has the build-update-repo command that is very useful to manage repositories. Starting at version 0.4.13 it supports --generate-static-deltas to generate the deltas. but it also has several other features that are useful. For instance, you can use:
xdg-app build-update-repo --title="Nice name" repo
To set a user readable name for the repository, which will be used by default in the UI when users see this repository.
It also lets you prune (--prune) unused objects and deltas from the repository, and even remove older revisions from your repository (--prune-depth) which is useful for things like automatic nightly build repositories.
Another thing build-update-repo does is appstream extraction. It scans all the branches in the repository and looks for an AppStream xml file. For instance, the dictionary app from part 3 contains such a file in files/share/app-info/xmls/org.gnome.Dictionary.xml.gz. All these files plus the icons they reference are collected and commited into a repo-wide appstream branch. xdg-app keeps a local copy of this branch for each remote, which you can manually update with:
xdg-app --user update --appstream nightly
This is used by graphical installation tools such as gnome-software, so having appstream data for your applications is important.
Note: xdg-app-builder automatically runs the appstream-compose command after the build. This will collect information from appdata files and desktop files and create the right xml.gz and icon files. This is where the xml in gnome-dictionary came from.
Another important part about app distribution is gpg signatures. By default OSTree refuses to pull anything from a remote repository that is not signed. This is only allowed if you use --no-gpg-verify when you add the remote (or you can change it with xdg-app remote-modify).
In OSTree, signatures are on each commit and on the summary file that lists all the branches in the repositories. These objects are created by the build-update-repo, and build-export commands, as well as indirectly by xdg-app-builder. So, when you call these, you should pass in the gpg keys to sign with, and optionally the gpg home directory to use. For example:
xdg-app build-export --gpg-sign=KEYID --gpg-homedir=/some/dir appdir repo
That concludes this tutorial series, and you should now know enough to package and distribute your own applications.
In part 1 we created a very small application. All it did was print to stdout. Such a program is very easy to sandbox. In fact, since we didn’t specify any permissions for it this application already runs in a very tight sandbox.
Here is what the sandbox does:
Of course, its very easy to secure a Hello world program, as it doesn’t need to do anything. There are designs (and experimental code) to allow applications to securely break out of the sandbox (using something called Portals). However, that is not stable for general use at this point. What is usable now though is punching minimal holes in the sandbox such that the applications can do what it needs.
We saw this already in part 2, where we used this command, granting X11 and network access:
xdg-app build-finish appdir2 --socket=x11 --share=network --command=gnome-dictionary
These arguments translate to these properties in the application metadata file:
[Application]
name=org.gnome.Dictionary
runtime=org.gnome.Platform/x86_64/3.20
sdk=org.gnome.Sdk/x86_64/3.20
command=gnome-dictionary

[Context]
shared=network;
sockets=x11;
As we gave no access to the filesystem in the above the resulting app can’t see your files. We can verify this with a command like:
$ xdg-app run --command=ls org.gnome.Dictionary ~/
<nothing>
The permissions in the metadata file are only the default values though. You can override these in different ways. First of all, xdg-app run takes the same command line arguments as build-finish, which can override permissions for that instance. For example, this will let it see your home directory:
$ xdg-app run --filesystem=home --command=ls org.gnome.Dictionary ~/
<homedir listing...>
You can also permanently override permissions for an application:
$ xdg-app --user override --filesystem=home org.gnome.Dictionary
$ xdg-app run --command=ls org.gnome.Dictionary ~/
<homedir listing...>
This can then again be overridden in a specific instance:
$ xdg-app run --nofilesystem=home --command=ls org.gnome.Dictionary ~/
<nothing>
There are quite a few options that control sandbox permissions. So, I’m going to list some useful examples of what can be done. (Note that all options have a negative version too, i.e. –unshare undoes –share.)
Grant access to some of your files:
  --filesystem=host    # All files
  --filesystem=home    # Your homedirectory
  --filesystem=home:ro # Your homedirectory, read-only
  --filesystem=/some/dir --filesystem=~/other/dir # paths
  --filesystem=xdg-download # The XDG Download directory
  --nofilesystem=...   # Undo some of the above
Allow the application to show windows using X11:
--socket=x11 --share=ipc
Note: –share=ipc means that the sandbox shares ipc namespace with the host. This is not necessarily required, but without it the X shared memory extension will not work, which is very bad for X performance.
Allow OpenGL rendering:
--device=dri
Allow the application to show windows using wayland:
--socket=wayland
Let the application play sounds using pulseaudio:
--socket=pulseaudio
Let the application access the network:
--share=network
Note: Giving network access also grants access to all host services listening on abstract unix sockets (due to how network namespaces work), and these have no permission checks. This unfortunately affects e.g. the X server and the session bus which listens to abstract sockets by default. A secure distribution should disable these and just use regular sockets.
Let the application talk to a named service on the session bus:
--talk-name=org.freedesktop.secrets
Let the application talk to a named service on the system bus:
--system-talk-name=org.freedesktop.GeoClue2
Give the application unlimited access to all of dbus:
--socket=system-bus --socket=session-bus
That was it for today. In the next part we’ll take a look at how to distribute your application.
Welcome back to this multi-part tutorial in how to create xdg-app applications. In part 2 we built a an xdg-app for gnome-dictionary. However, if you look closely at the commands we used you will set not much what we did was specific to this application.
In fact, the only things related to gnome-dictionary are the:
Why is this?
It turns out that most open source applications are built in very similar ways. One can even consider this an API for building modules. And if some module does not conform to this API, then it is easy to change the upstream to conform, or if upstream is not interested, apply a local patch.
The xdg-app-builder tool that ships with xdg-app is based on this idea. You describe your application, and the modules you want to build into it, and then xdg-app-builder takes care of calling the lower-level xdg-app build commands for you.
The equivalent of what we did in part 2 is this json:
{
  "app-id": "org.gnome.Dictionary",
  "runtime": "org.gnome.Platform",
  "runtime-version": "3.20",
  "sdk": "org.gnome.Sdk",
  "command": "gnome-dictionary",
  "finish-args": [
     "--socket=x11",
     "--share=network"
  ],
  "modules": [
    {
      "name": "gnome-dictionary",
      "sources": [
        {
          "type": "archive",
          "url": "https://download.gnome.org/sources/gnome-dictionary/3.20/gnome-dictionary-3.20.0.tar.xz",
          "sha256": "efb36377d46eff9291d3b8fec37baab2355f9dc8bc7edb791b6a625574716121"
        }
      ]
    }
  ]
}
If you put this in a file called org.gnome.Dictionary.json you can build and export the app using:
$ xdg-app-builder --repo=repo appdir3 org.gnome.Dictionary.json
And to test this you use:
$ xdg-app --user update org.gnome.Dictionary
$ xdg-app run org.gnome.Dictionary
So the above commands downloaded the files, initialized the build dir, built the modules, finished the app and exported it to the repo. Just like we did before.
However, even for this simple file it did a lot of other nice things too.
Other than this xdg-app-builder has a lot of useful features. The obvious one is that you can build multiple modules into the application, and you can have multiple sources for each module. Sources can be of several types. Currently it supports: archive (.tar, .zip), git, bzr, patch files, and just running shell commands.
There is also a cleanup phase that happens after the build. This phase lets you remove things that was added during the build, that will not be needed during runtime. For instance, you can remove headers, development docs and similar things here. xdg-app-builder supports two properties for this. First a list of filename patterns, and secondly a list of commands to run during the cleanup phase.
"cleanup": [ "/include", "/bin/foo-*", "*.a" ]
"cleanup-commands": [ "sed s/foo/bar/ /bin/app.sh" ]
Additionally, the cleanup property can be set on a per-module basis, and will then only match filenames that were created by that particular module.
Another special feature is the rename-icon, rename-desktop-file and rename-appdata properties which lets you rename these kinds of files to match the application id. You have to do this because upstream files don’t use the application id in the name, which is not allowed by xdg-app during export.
The nightly build of the gnome applications all are built using xdg-app-builder, and you can get a lot of example json files there, for instance a complete version of gnome-dictionary built from git. I also have a few more examples here.
For detailed documentations on all xdg-app-builder properties. See the man page for xdg-app builder.
That is it for today. Next time we will take a look at some details about the xdg-app sandbox.
Welcome back to this multi-part tutorial in how to create xdg-app applications. In part 1 we installed everything we needed and manually created our first application. In this part we will build a more complex application, using the basic xdg-app tools.
I chose to build the gnome dictionary application, because its a small app with no dependencies. To build it we use the SDK (software development kit) that matches the runtime we used in the previous part. The SDK contains the development toolchain and the headers needed to build applications using the libraries in the runtime.
First we need to install the SDK. This is rather large, so it may take a while:
xdg-app --user install gnome org.gnome.Sdk 3.20
We also want the sources to the application we want to build:
wget https://download.gnome.org/sources/gnome-dictionary/3.20/gnome-dictionary-3.20.0.tar.xz
Just like last time we start by creating the application directory where the application will be installed. However, this time we use the build-init command to create it:
xdg-app build-init appdir2 org.gnome.Dictionary org.gnome.Sdk org.gnome.Platform 3.20
This creates a directory called “appdir2” with a metadata file and the right directory structure. The only difference from last time is that the metadata file specifies a sdk as well as a runtime. A sdk is really just a runtime, but it is used during the build phase, rather than when the user runs the app.
Now that we have specified a sdk we can use the xdg-app build command. This is very similar to the run command, except it operates on an application build directory rather than an installed application, and it uses the sdk instead of the regular runtime. It also gives the sandbox access to all your files. For example, you can run:
$ xdg-app build appdir2 touch /app/some_file
$ xdg-app build appdir2 ls -l /app
total 0
-rw-r--r-- 1 alex wheel 0 Feb 19 16:03 some_file
This will have created a file “appdir2/files/some_file” in your tutorial directory.
Using this command you can build the application like you normally would, except in a sandbox. Since it is in a sandbox it will automatically use the compiler and other tools from the sdk. gnome-dictionary builds fine with a traditional configure; make; make install; incantation, so we only have to add a xdg-app prefix to these:
tar xvf gnome-dictionary-3.20.0.tar.xz
cd gnome-dictionary-3.20.0/
xdg-app build ../appdir2 ./configure --prefix=/app
xdg-app build ../appdir2 make
xdg-app build ../appdir2 make install
cd ..
We also need to give the app access to X11 and the network, and specify the command that is used to start the app. This is done with the build-finish operation:
xdg-app build-finish appdir2 --socket=x11 --share=network --command=gnome-dictionary
This adds some extra info to the metadata file, and creates the exports directory, which we’ll come back to later. You can install and try the app by running
xdg-app build-export repo appdir2
xdg-app --user install tutorial-repo org.gnome.Dictionary
xdg-app run org.gnome.Dictionary
You will see some warnings because we didn’t grant the app access to the dconf database, but other than that everything works.
On interesting new thing here is the exports mentioned above. If you look into the appdir2/export/ directory you will find this structure:
appdir2/export
└── share
    ├── applications
    │   └── org.gnome.Dictionary.desktop
    └── dbus-1
        └── services
            └── org.gnome.Dictionary.service
And when the app is installed, these files will be exported into ~/.local/share/xdg-app/exports/. The xdg-app package then sets the XDG_DATA_DIRS environment variable to point to this directory, which means your desktop environment will look in it. This sounds a bit complicated, but what it means is that once the app is installed it will automatically appear among the normal applications in your desktop environment.
There is one limit on what gets exported though. All the filesnames (not directory names) must have the application id as a prefix. This works in the above setup because the desktop file is org.gnome.Dictionary.desktop, which is what we used for the id. This limitation guarantees that applications cannot cause conflicts, and that they can’t override any system installed applications.
We have now built a simple application with no dependencies. If there are any dependencies that are not in the runtime you need to build those too. This means more cycles of configure; make; make install; While this is not hard, it is a lot of manual repeated work. In the next part of this series we will see how this can be automated using the xdg-app-builder tool.
Welcome to part 1 in this multi-part tutorial in how to create xdg-app applications.
First of all you need to install xdg-app. Fedora 23 ships with xdg-app packages, but some distributions do not. I have made this page with packages that you can use.
This tutorial is using xdg-app 0.4.12, which is the latest version. Older versions should work too, but minor things may need to be changed in the commands, and not all features may be supported.
A fundamental concept in xdg-app is the runtime/application split. Every app depends on a runtime, which supplies the core libraries that the app relies on. Runtimes are typically shared by many applications, but a user can have multiple runtimes installed at the same time.
For this tutorial we will be using the gnome nightly build runtime. It is available in a xdg-app repostitory on sdk.gnome.org. If you tried the gnome nightly builds from my previous blog entry you will have these already, but otherwise you can get it by doing:
$ wget https://sdk.gnome.org/keys/gnome-sdk.gpg
$ xdg-app --user remote-add --gpg-key=gnome-sdk.gpg gnome http://sdk.gnome.org/repo
$ xdg-app --user install gnome org.gnome.Platform 3.20
Once it is installed you can also update it by doing:
xdg-app --user update org.gnome.Platform 3.20
Now we have all that we need to create a simple application. Lets start by writing an application. Put this in a file called “hello.sh”:
#!/bin/sh
echo "Hello world, from a sandbox"
Then we need some information about the application. In xdg-app this is in specified in a key-value file called “metadata”. For a simple app like this it doesn’t contain much, so we can create it manually:
[Application]
name=org.test.Hello
runtime=org.gnome.Platform/x86_64/3.20
command=hello.sh
This specifies the application identifier (org.test.Hello) as well as the runtime the application uses and the command to start the app with.
An xdg-app really doesn’t require more than this, although the application must have a special layout. Using these sources we can create an application directory “appdir” like this:
mkdir appdir
mkdir appdir/files
mkdir appdir/files/bin
mkdir appdir/export
cp metadata appdir/
cp hello.sh appdir/files/bin/
chmod a+x appdir/files/bin/hello.sh
In order for xdg-app to be able to install this application we need to put it in an repository. This is done with the build-export command:
xdg-app build-export repo appdir
This will initialize a local repository in the directory “repo” and export the app to it. We can test it using:
xdg-app --user remote-add --no-gpg-verify tutorial-repo repo
xdg-app --user install tutorial-repo org.test.Hello
xdg-app run org.test.Hello
This will print “Hello world, from a sandbox”, which means we just created, packaged, installed and ran our first xdg-app application!
If you want to examine the sandbox a bit you can use the –command=sh argument to xdg-app run, which will give you a shell inside the application sandbox where you can explore the sandbox. For example:
[alex@localhost ~]$ xdg-app run --command=sh org.test.Hello
sh-4.3$ ls -lR /app
/app:
total 0
drwxr-xr-x 1 alex wheel 16 jan 1 1970 bin
/app/bin:
total 4
-rwxr-xr-x 2 alex wheel 45 jan 1 1970 hello.sh
sh-4.3$ echo $PATH
/app/bin:/usr/bin
sh-4.3$ hello.sh
Hello world, from a sandbox
sh-4.3$ ls -la ~/
total 0
drwxr-xr-x 3 alex wheel 60 feb 19 16:11 .
drwxr-xr-x 3 alex wheel 60 feb 19 16:11 ..
drwxr-xr-x 3 alex wheel 60 feb 19 16:11 .var
sh-4.3$ ls ~/.var/app/org.test.Hello/
cache  config  data
Here we see that all the files from the application appears in /app, and PATH points to /app/bin which means you can easily run it. We also see that by default the application has no access to any files from the users home directory (it’s empty) other than the ~/.var/app/org.test.Hello directory where the app can store its own data. You can also explore /usr, which comes from the runtime.
This is a very manual approach to creating a xdg-app, in the next part of this tutorial we will look at how to use the “xdg-app build” command and an SDK to build applications.
Lot of interesting work on xdg-app lately!
I’ve created a new runtime based on the latest unstable gnome, and during the Gnome developer experience hackfest we made bundles for a bunch of core Gnome applications.
I’ve set up a nightly build of these so that anyone can play with the latest Gnome apps on any distro, without having to build anything.
Additionally, Richard and I have been working on making gnome-software able to work with xdg-app.
The culmination of this is using xdg-app to install gnome-software and then using that to install more xdg-apps:
This works out of the box on Fedora 23, just make sure you have xdg-app 0.4.11 installed (it’s in updates-testing at the moment). For other distributions, I have made packages which are available here.
Once you have xdg-app installed, its very easy to test them. First you need to add the remote repositories:
$ curl -O http://sdk.gnome.org/nightly/keys/nightly.gpg
$ xdg-app --user remote-add --gpg-key=nightly.gpg gnome-nightly http://sdk.gnome.org/nightly/repo/
$ xdg-app --user remote-add --gpg-key=nightly.gpg gnome-nightly-apps http://sdk.gnome.org/nightly/repo-apps/
Then you need to install the runtime:
$ xdg-app --user install gnome-nightly org.gnome.Platform
And then you can install some app:
$ xdg-app --user install gnome-nightly-apps org.gnome.Weather
At this point the app is installed and you should be able to start it like any regular app in your desktop. You can also manually start it via xdg-app:
xdg-app run org.gnome.Weather
The list of available apps can be seen with:
$ xdg-app --user remote-ls gnome-nightly-apps --app
Or you can install and use gnome software like in the demo.
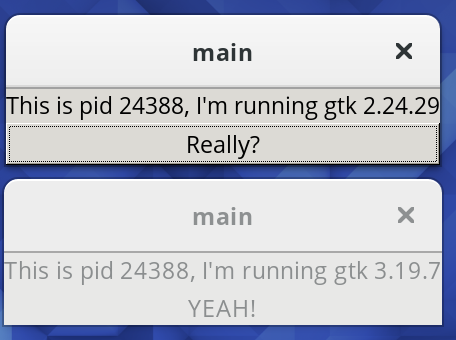
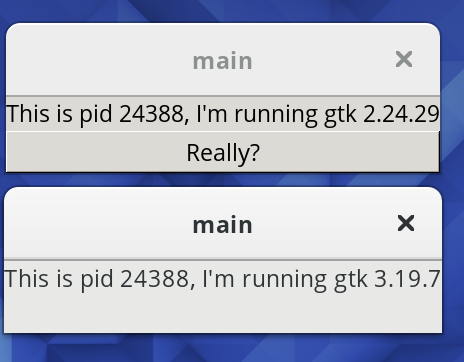 After clicking the button:
I’m here at the gnome Developer Experience Hackfest in Brussels working on xdg-app. Just before I left I created a runtime for Gnome based on whatever is in git master. Now we’ve started to create app bundles for the gnome applications.
I’ve added builds of evince, gedit, gnome-builder, and maps. Cosimo has added Weather, and clocks and Alberto added gnome-calculator. The build manifests for these are in my github repo, and I have set up an automatic build of these (and the SDK).
Unfortunately the build machine is way underpowered, so its not yet useful for public consumption. I’m working on getting this to build on the gnome build machines, which means people can start testing the latest builds of gnome apps on any distros.
I’ve also been working with Simon to fix various issues that he’s seeing while packaging xdg-app for debian.
On to building more apps!
Thanks to the gnome foundation for sponsoring this trip, and arranging the hackfest.