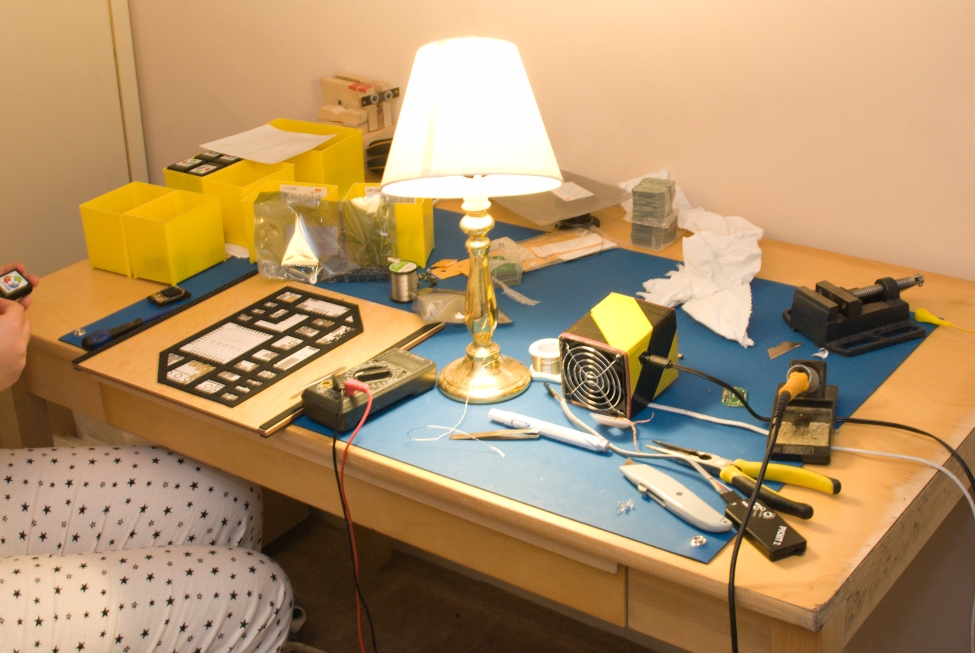
This week we will hit a milestone we thought we might not ever reach – selling ColorHug device number 2000. We started making ColorHugs just 18 months ago and have come a long way from the first batch that was hand-built on a desk in our back bedroom. I started the project as a hobby to make some embedded hardware as it was something I enjoyed doing at University and hadn’t done for a while. I assured my wife we wouldn’t need to make more then 50. So imagine how we felt when we got over 800 responses to a single blog post. I only wrote it to check it was worth making that initial batch! So this hobby turned into a second job almost overnight that came with all the fun dealing with customer emails, legal issues and setting up a business that pays tax. Ania was not best pleased when our lovely guest room turned into our manufacturing department and my “hobby” had her screwing devices together on weekends, evenings and even on Boxing Day.
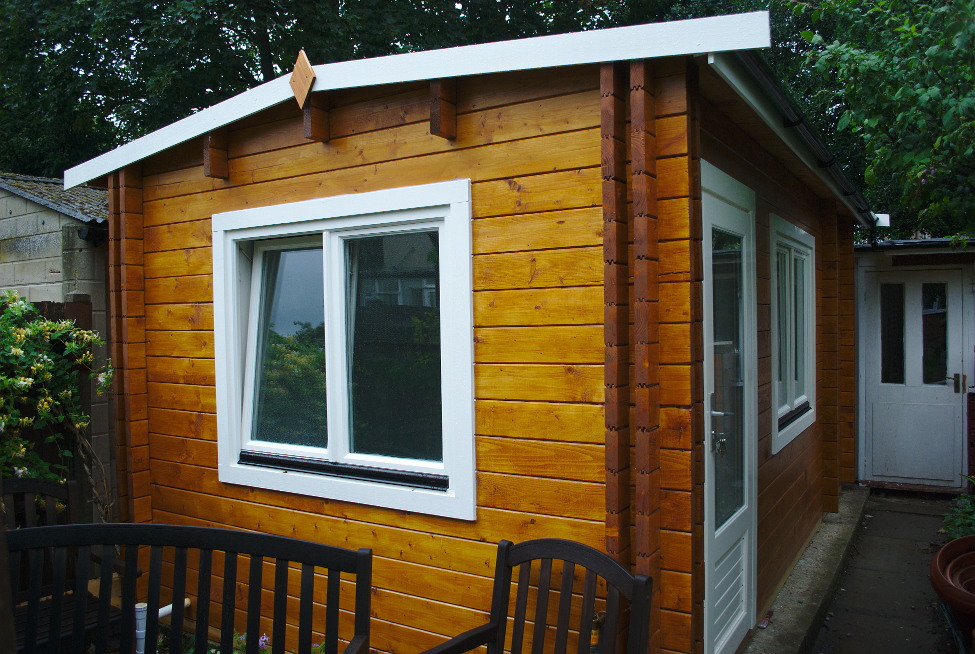
A lot has changed since that first batch. From outsourcing the PCB fabrication and to occasionally recruiting my mum, dad and of course Ania in the manufacture, assembly, dispatch and administrative aspects of ColorHug. We finally have a new outside office – so after nearly two years we have our house back! And most importantly we have had a little girl, who keeps us very busy and thus has slowed the development of the ColorHug Spectro.
Building an OpenHardware device has definitely been a worthwhile pursuit and something I believe in. We will have built and shipped 2000 devices all around the world, including issuing two lots of free gifts to update early adopters with the latest accessories and design improvements. We’ve also built a large community who are using ColorHugs all over the world for calibrating external screens and panels in domestic and commercial settings.
We still don’t make much profit on each unit and definitely wouldn’t recommend making calibration hardware as a get rich quick scheme, but we have enjoyed growing ColorHug and fostering the community that has built up around it. We’d like to take this opportunity to thank everyone who has helped make ColorHug a success – from those who’ve helped make the device through to those who contribute in the community by testing and reporting bugs.
Some interesting statistics from the last 18 months:
- Total Sold: 1998
- Number of Batches: 8
- Typical number of jiffy bags ready to go at any time: 60
- Number of returns: 8
- Number of automated emails from PayPal: 2520
- Number of emails Ania and I have sent (most semi-automated): 5087
- Number of LiveCD updates: 9
- Number of different countries sent to: 21
- Amount of money spent on postage: £9,354
So, basically, we’re very humbled and grateful! Richard, Ania and baby Hughes.


Congratulations from a happy ColorHug user.
Hi Richard,
Thanks for the time you and your family gave us. I love OpenSource for all this time people give to make things better (and cheaper than any other calibration tool in this cas).
A pleased ColorHug User.
I recall listening to you being interviewed on Ubuntu (UK) Podcast and thought how fantastic an idea it was. The interview opened my eyes to the implications of bad colour calibration.
Congratulations.
My colourhug is great, I love it!
My respect for pulling this off and keeping on going.
That’s an awesome office. I notice double-insulated walls, but particularly the UPVC doors and windows. Are they an “after-market” addition? Can I ask which company you got to build it?
It’s awesome indeed. It’s from UK logcabins, and comes with internal reflective insulation in-between the walls and the double skinned roof. I also routed the ethernet, power, phone, lighting, and fiber-optic into the cavities. If you’re going to do something similar, be aware that it only takes 4 days (long, hard days!) to assemble with 2 or 3 other people, but it took about 3 months of working most evenings for a couple of hours to get the thing painted and habitable. I also did all the wiring and plumbing (running water too!) I’m pretty anal, so the painting was, roughly:
* 3 coats sikkens on the outside
* primer, undercoat, gloss, gloss on the wooden windows (double glazed) the white highlights
* about 20 tubes of caulk
* about 4 coats of sikkens semi-permeable on the inside walls
* primer, undercoat, gloss, gloss on the internal and external door
* carpet
It did cost a fair bit (although, about half to cost of something involving brick) but I needed something technically “temporary” for planning reasons. I saved a shit-ton of money by helping assembling it, and the actual wiring and plumbing and decorating didn’t cost too much other than the cost of the paint. It’s an awesome space and has really freed up the house as internally it’s 30% “storeroom” and 70% “office”.
The shed reminds me of stories about the old British inventors with their sheds and stuff. :)
That’s not too different from the truth! :)