
This is Part 2 in a series about the Discovery Docs initiative, which I will present about in my upcoming GUADEC talk. In Part 1: Discovering Why, I gave a brief history of GNOME documentation, and explained our current unabashedly boring task-based approach. I proposed focusing instead on learning and discovery in an attempt to attract and retain enthusiastic users. In this post, I’ll explore what a learning-based topic might look like.
GNOME documentation currently focuses on tasks, concepts, and references, with tasks doing the bulk of the work. This is a common approach across the entire documentation industry, but that doesn’t mean it’s the only approach. Notably, we don’t strictly enforce these taxonomies as some other documentation systems do. Rather, we provide some templates and guidelines, and we trust humans to make good judgment.
To shift to a more engaging approach, I’m exploring a lengthier topic type that I’m hesitantly calling a “lesson”. A lesson incorporates a concept, possibly a task, possibly a quick reference, and further reading for specific use cases or advanced users. It should be readable in about five to seven minutes. Let’s break down an outline of a lesson.
- Summary: A nicely formatted bullet list that provides a key point and a quick mention of what you are able to do. This acts as a guidepost so readers know they are in the right place, and for certain users, it may be the only thing they need.
- Splash image: A well designed image can convey a lot of conceptual information. We don’t want to show random screenshots, but rather craft images that engage and explain, and which preferably do not need to be translated.
- Concept: An explanation of what this thing is and how it has an impact on you. Traditionally, this would be its own concept topic.
- Main task: A list of steps for a main task, if one exists for this lesson. Traditionally, this would be its own task topic.
- Quick ref: A short table or list of things, if that applies to this lesson. Larger references should probably still be split into their own topics.
- More tasks: Sometimes there are further tasks you might be interested in. If they don’t warrant their own lesson, we can put these in a collapsed section.
- More information: Sometimes there is further conceptual information you might be interested in, but which not everybody cares about. We don’t want to clutter the top of the page. This can go in a collapsed section.
- Advanced: Finally, sometimes there are concepts or tasks that we would only expect advanced users to mess with. This can go in a collapsed section, clearly marked as advanced.
Let’s explore what this would look like for some real-world documentation.
Compose Key
The compose key saw a lot of work in GNOME 40, from being moved into the main Settings, to getting visual feedback. It’s a great candidate for a lesson, because the task of “Set a compose key” misses the point of what most users are trying to accomplish. What people really want to do is type accented characters that aren’t on their keyboard. It is on us to explain the different ways they might do that, and how those mechanisms work.
A lesson for the compose key would start off with a three-item summary:
- Use the compose key to enter accents and other special characters with a few easy to remember keystrokes.
- You can define a compose key in the Keyboard Settings.
- Advanced users can define their own compose key sequences.
For the average user looking to type “naïveté”, the first bullet point lets them know that this lesson is relevant to them. They know right away whether to read more or back away. For users who already know what a compose key is, the second bullet point might be all the information they need. And if you’re the kind of person who doesn’t mind editing dot files in text editors, we let you know there’s some bonus info at the end.
Then comes the splash image. A visual actually helps to convey the concept of the compose key very well. In his blog post on adding visualizations, Matthias showed three images of text fields as you type a compose sequence. We can pull these together with indications of key presses, as in this poorly done and hastily made prototype image:
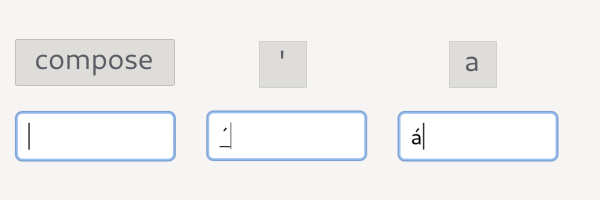
Follow this with a conceptual overview of what a compose key is, and how you press mnemonic key sequences in a row, not all at once. Talk about what kinds of characters are best entered with a compose key— generally accented characters and variations of things found on keyboards. Maybe mention other methods of entering special characters. Mention that compose keys aren’t an actual physical thing, and that you have to redefine some key you don’t use.
After the reader understands what a compose key is, we present the main task, which is to define a compose key. This is perhaps a four-step task.
After that, we might have a quick reference of compose key sequences, or it may be worthwhile to have a separate reference topic altogether. This is a judgment call I could only make after starting to write. (Side note: It occurs to me that cases like this might call for partially collapsed tables or lists, where you always see the first handful of rows or items, and you expand for more.)
Finally, since our summary promised it, we finish with a section on defining compose key sequences, collapsed by default, and clearly marked as advanced.
Workspaces
Workspaces are another area that I think would benefit from learning-oriented topics. There’s not really any single task associated with them. In fact, they may not even answer any specific user question. Instead, they’re something you happen to learn about, and then love. A summary of a workspace lesson might look like this:
- Workspaces allow you to organize your apps and windows into spaces that work for you.
- You can launch apps on specific workspaces and move windows between workspaces.
- You can also use convenient keyboard shortcuts and gestures to work with workspaces.
For a splash image, consider this beautifully drawn image from GNOME Tour:

This isn’t a screenshot, and it doesn’t need to be translated. It doesn’t tell you how to do anything specific with workspaces, but it nicely illustrates what they are and why you might want to use them. There’s a workspace for multimedia (with cassettes, lol). There’s one for pictures and drawing. To the left, we see a document being worked on. And to the right, we presumably see me getting frustrated with my taxes.
There’s no primary task with workspaces, at least not the sort that we can list steps for. They’re always there, on demand, just waiting to be used. But we can provide a quick reference of things you can do, and easy ways to do them. Things like moving windows between workspaces, or quickly switching workspaces with keyboard shortcuts and gestures.
Then there’s further information, like using workspaces on multiple monitors. This is an interesting case, because it could be further information within the workspaces lesson, or it could be its own lesson. It likely has enough material for its own lesson. I could write a summary and a conceptual overview, and there’s a primary task in changing whether workspaces show on secondary displays. There’s even excellent imagery that helps explain the concept. Consider this pair of images from the GNOME Shell blog:
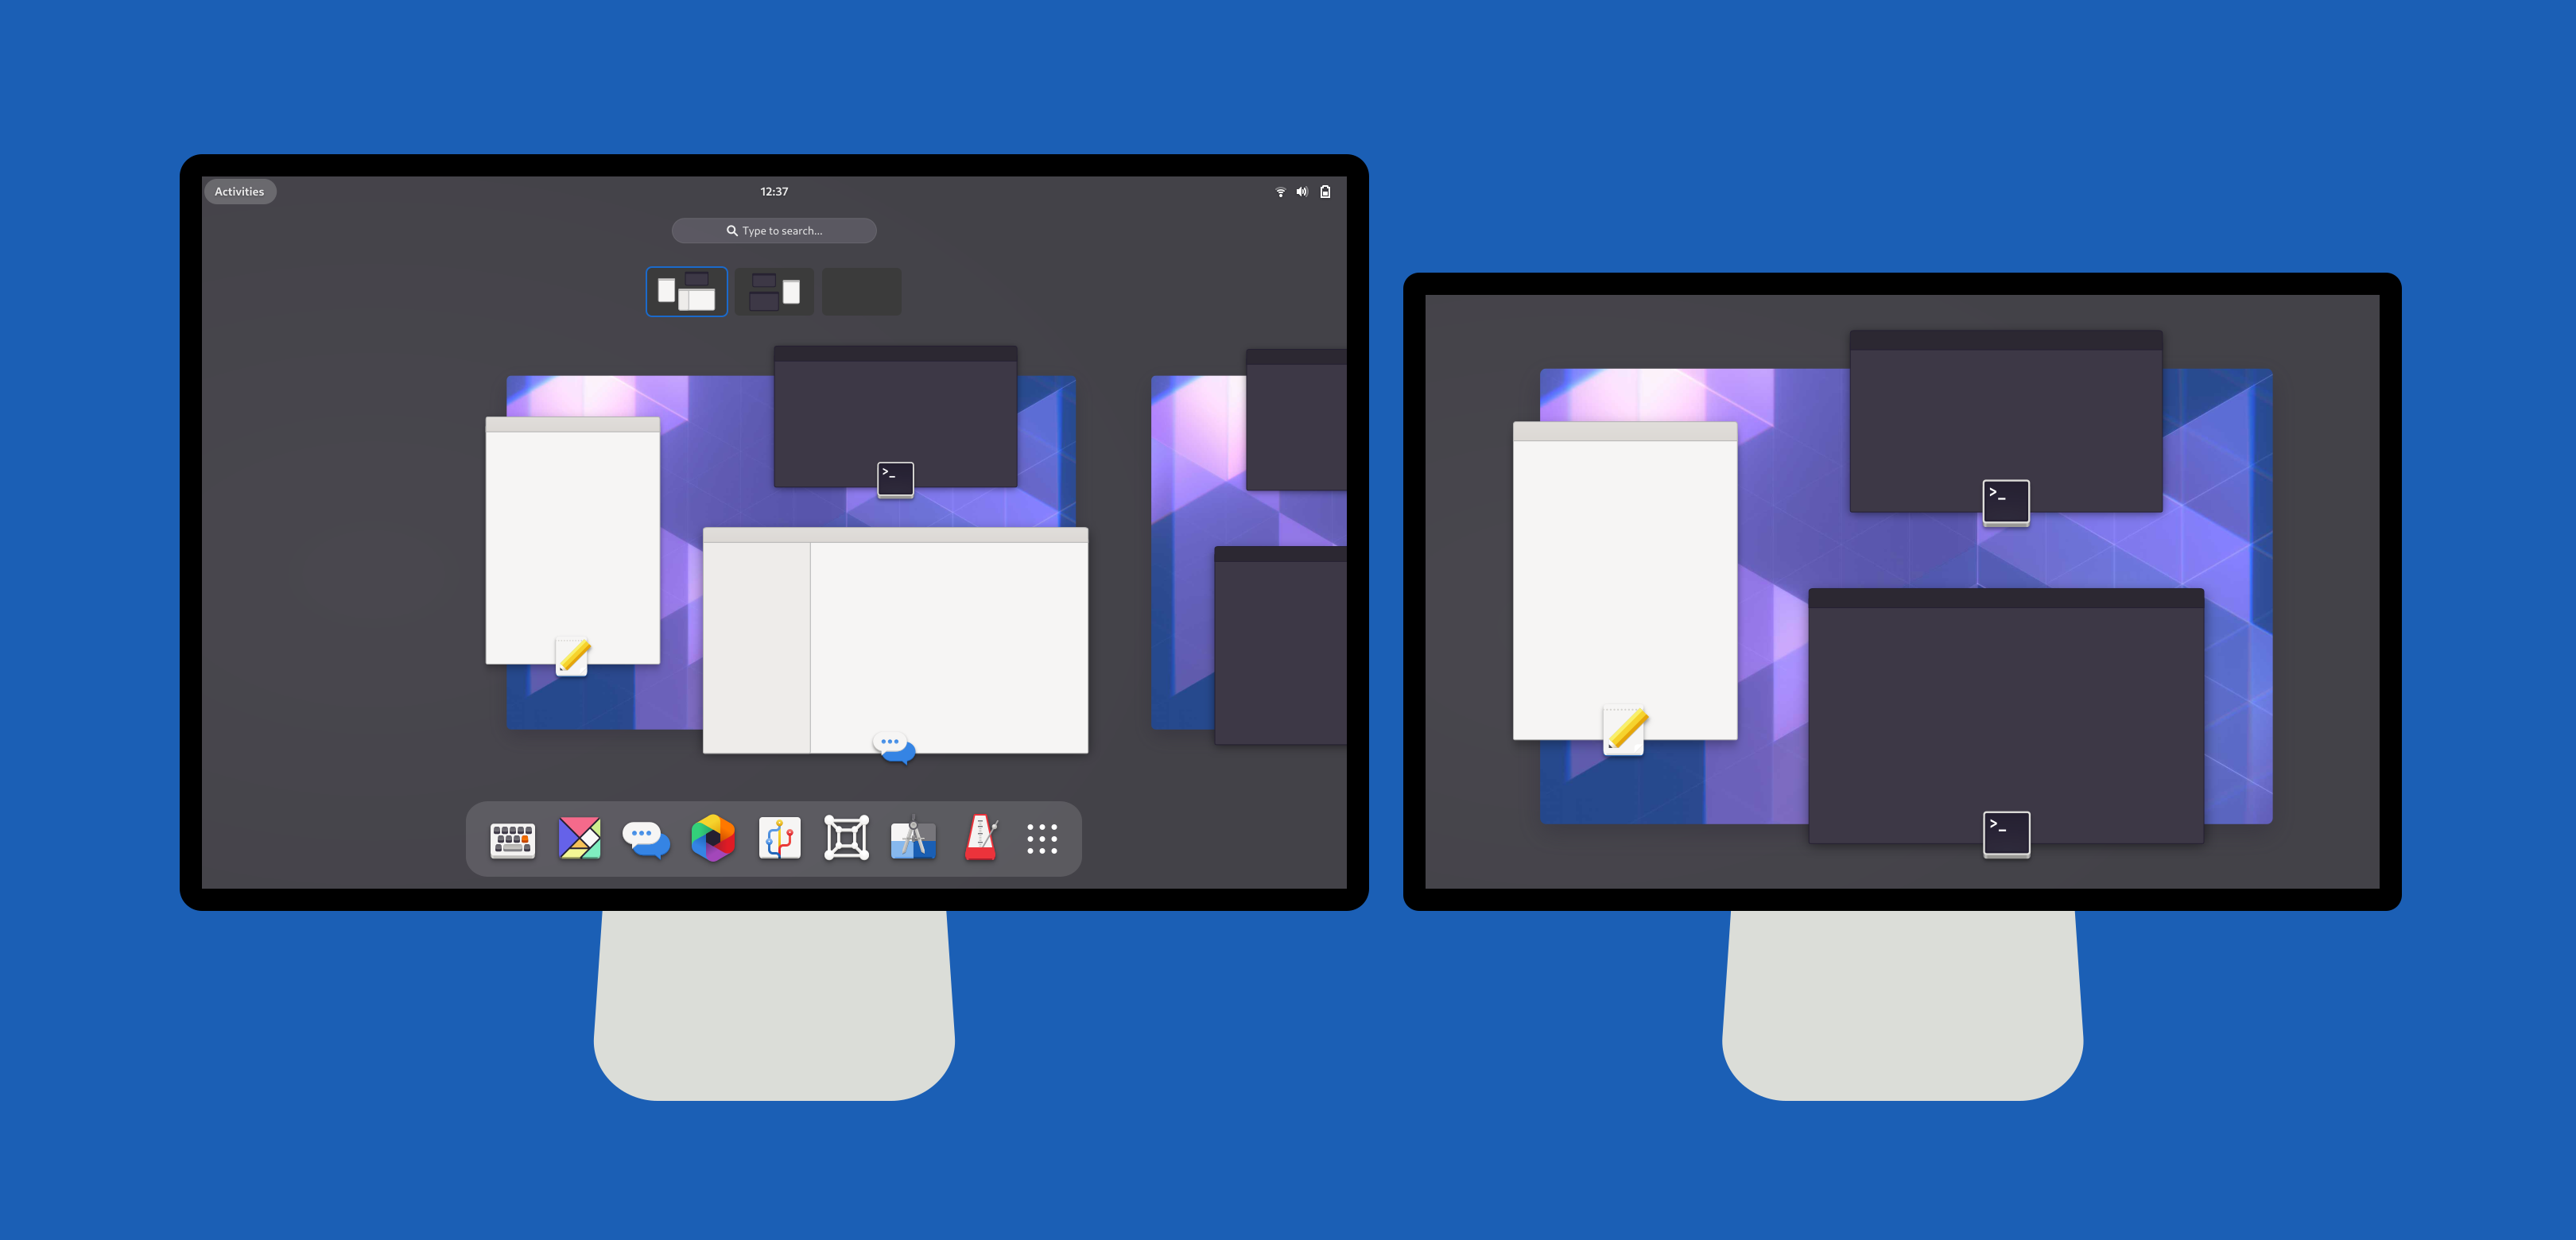

These images nicely illustrate how the default configuration treats workspaces as something contained by the primary display, where secondary displays are sort of extra always-visible workspaces. But you can change to a model where workspaces effectively contain the displays. The images contain a small amount of translatable text, but that can be fixed or ignored with no real loss of information. And we could easily provide an RTL variant without burdening translators.
More lessons
I’ve already gone past my recommended max seven minute reading time, so I won’t dive into other topics in detail. But I will make a few notes:
- The wireless hotspot functionality shows a QR code you can scan to connect quickly. There’s a proposal to add instructions on how to use this on common devices. We don’t want individual task topics for these, but they would fit nicely under “more tasks” in a lesson on hotspots.
- The current topics on using speakers and using microphones already start with some conceptual information, and issues 107 and 116 list other things they could discuss. Most of this doesn’t fit well in tasks, and nobody will read a dozen tiny topics.
Lessons may not work for everything. They may not replace standalone references or concepts, although even those topic types might benefit from summaries and visual appeal. Lessons can be more engaging than tasks, which can make them more fun to read and to write.
In the next part of this series, I will discuss voice and style. Join me.
