Gaming with GThree

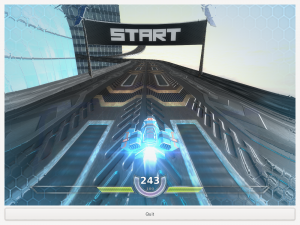
The last couple of week I’ve been on holiday and I spent some of that hacking on gthree. Gthree is a port of three.js, and a good way to get some testing of it is to port a three.js app. Benjamin pointed out HexGL, a WebGL racing game similar to F-Zero.

This game uses a bunch of cool features like shaders, effects, sprites, particles, etc, so it was a good target. I had to add a bunch of features to gthree and fix some bugs, but its now at a state where it looks pretty cool as a demo. However it needs more work to be playable as a game.

Check out this screenshot:

Or this (lower resolution) video:

If you’re interested in playing with it, the code is on github. It needs latest git versions of graphene and gthree to build.

I hope to have a playable version of this for GUADEC. See you there!

Gthree update, It moves!

Recently I have been backporting some missing three.js features and fixing some bugs. In particular, gthree supports:

  • An animation system based on keyframes and interpolation.
  • Skinning, where a model can have a skeleton and modifying a bone affects the whole model.
  • Support in the glTF loader for the above.

This is pretty cool as it enables us to easily load and animate character models. Check out this video:

Gthree is alive!

A long time ago in a galaxy far far away I spent some time converting three.js into a Gtk+ library, called gthree.

It was never really used for anything and wasn’t really product quality. However, I really like the idea of having an easy way to add some 3D effects to Gnome apps.

Also, time has moved on and three.js got cool new features like a PBR material and a GLTF support.

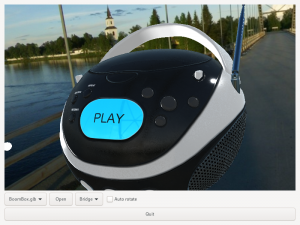
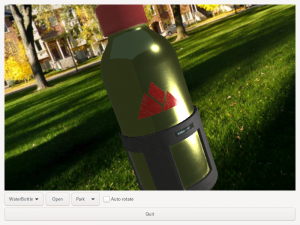
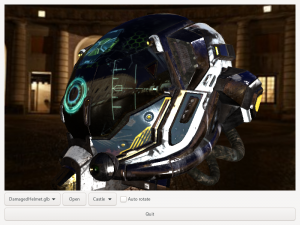
So, last week I spent some time refreshing gthree to the latest shaders from three.js, adding a GLTF loader and a few new features, ported to meson and did some general cleanup/polish. I still want to add some more features in like skinning, morphing and animations, but just the new rendering is showing off just how cool this stuff is:

Here is a screencast showing off the model viewer:

Cool, eh!

I have to do some other work too, but I hope to get some more time in the future to work on gthree and to use it for something interesting.

Broadway adventures in Gtk4

One of my long running side projects is a Gtk backend called “Broadway”. Instead of rendering to the screen this backend creates a HTTP server that you can connect to, and then exposes the UI remotely in the browser.

The original version of broadway was essentially streaming image frames, although there were various ways to optimize what got sent. This matches pretty well with how Gtk 3 rendering works, particularly on Wayland. Every frame it calls out to all widgets, letting them draw on top of a buffer and then sends the final frame to the compositor. Broadway just inserts some image delta computation and JavaScript magic in the middle of this.

Enter Gtk 4, breaking everything!

However, time moves on, and the current development branch of Gtk (which will be Gtk 4) has completely changed how rendering works, with the goal of doing efficient rendering on modern GPUs.

In the new model widgets don’t directly render to a buffer. Instead they build up a model of how the final result should look in terms of something called render nodes. These describe rendering as a tree of highlevel operations. The backend (we have software, OpenGL and Vulkan backends) then knows how to take this description and submit it to the GPU in an efficient way. This is somewhat similar to the firefox WebRender project.

Its would be possible to implement the broadway backend by hooking up the software renderer, letting it generate a buffer and then send that to the browser.  However, that is pretty lame!

CSS comes to the rescue!

Instead I’ve been looking at making the browser actually draw the render nodes. Gtk defines a lot of its UI in terms of CSS these days, and that means that the render nodes actually are very close to the CSS rendering model. For example, the basic drawing operation are things like rounded boxes with borders, shadows, etc.

So, I was thinking, could we not take these render node and turn them into actual DOM nodes with CSS styles and send them to the browser. Then every frame we can just diff the DOM trees, sending the minimal changes necessary.

Sounds crazy right? But, it turns out to work pretty well.

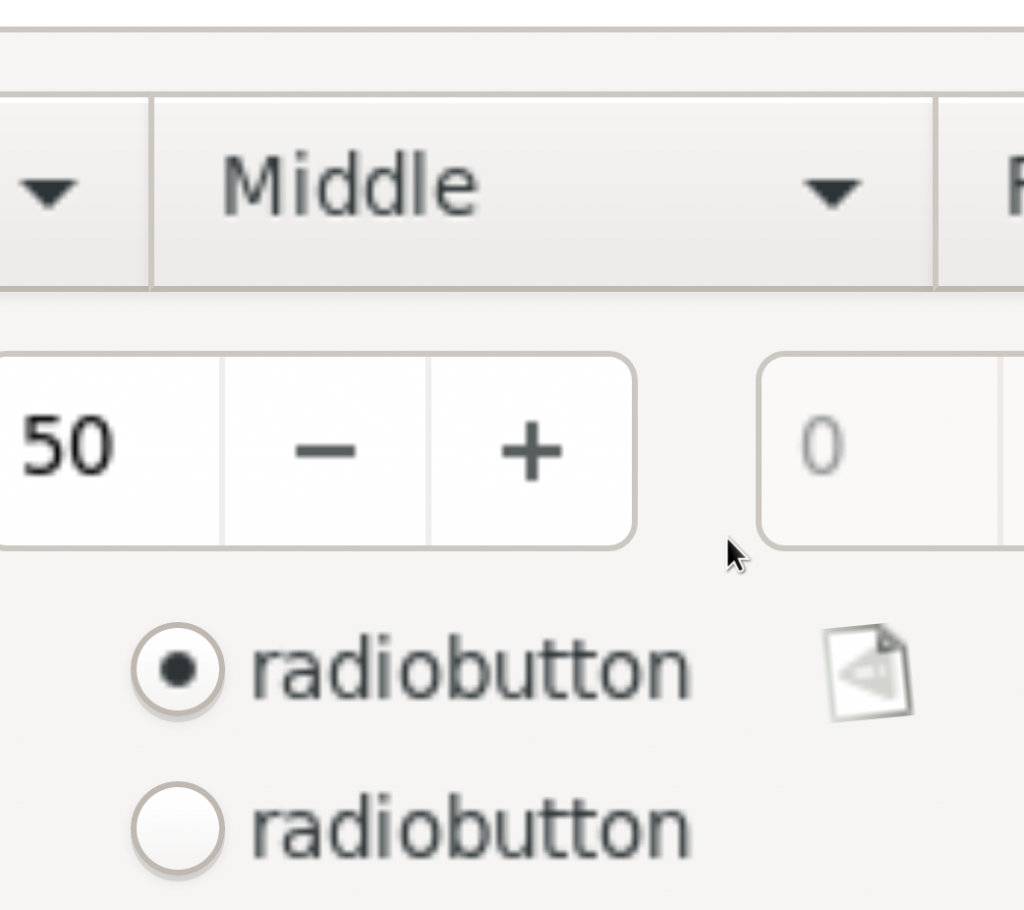
Check out this example page which I created with the magic of “save as”. In particular, try zooming into that page in the browser, and play with the developer tools inspector to see the nodes. Here is a part of it zoomed in:

The icons and the text are not CSS, so they don’t scale, but look at those gorgeous borders, shadows and gradients!

Entering the 3rd dimension!

Particularly interesting is the support in Gtk for general 3D transforms. This maps well to the CSS transform on the browser style.

Check out this example of a spinning-cube transition. If you open up the browser inspector you can see that each individual element in the cube is still a regular CSS box.

Some technical notes

If you look at the examples above they all use data: uris for images. This is a custom mode that lets “screenshots” like the above work. Normally broadway uses blobs for the images.

Also, looking at the examples they seem very heavy in terms of images, as all the text are images. However, in a typical frame most of the render tree is identical to the previous frame, meaning any label that was used in the last frame need not be sent again. In fact, even if it changes position in the tree due to a parent node changing (scrolling, cube-switching, etc) it can still be reused as-is.

However, text is clearly the weak point in here. Unfortunately HTML/CSS has no low-level text rendering APIs we could use. I’m considering generating a texture atlas with pre-rendered glyphs that can be reused (like CSS sprites) when rendering text, that would mean we will have to download less data at least. If anyone has other ideas I would love to hear about it.

Introducing flat-manager

A long time ago I wrote a blog post about how to maintain a Flatpak repository.

It is still a nice, mostly up to date, description of how Flatpak repositories work. However, it doesn’t really have a great answer to the issue called syncing updates in the post. In other words, it really is more about how to maintain a repository on one machine.

In practice, at least on a larger scale (like e.g. Flathub) you don’t want to do all the work on a single machine like this. Instead you have an entire build-system where the repository is the last piece.

Enter flat-manager

To support this I’ve been working on a side project called flat-manager. It is a service written in rust that manages Flatpak repositories. Recently we migrated Flathub to use it, and its seems to work quite well.

At its core, flat-manager serves and maintains a set of repos, and has an API that lets you push updates to it from your build-system. However, the way it is set up is a bit more complex, which allows some interesting features.

Core concept: a build

When updating an app, the first thing you do is create a new build, which just allocates an id that you use in later operations. Then you can upload one or more builds to this id.

This separation of the build creation and the upload is very powerful, because it allows you to upload the app in multiple operations, potentially from multiple sources. For example, in the Flathub build-system each architecture is built on a separate machine. Before flat-manager we had to collect all the separate builds on one machine before uploading to the repo. In the new system each build machine uploads directly to the repo with no middle-man.

Committing or purging

An important idea here is that the new build is not finished until it has been committed. The central build-system waits until all the builders report success before committing the build. If any of the builds fail, we purge the build instead, making it as if the build never happened. This means we never expose partially successful builds to users.

Once a build is committed, flat-manager creates a separate repository containing only the new build. This allows you to use Flatpak to test the build before making it available to users.

This makes builds useful even for builds that never was supposed to be generally available. Flathub uses this for test builds, where if you make a pull request against an app it will automatically build it and add a comment in the pull request with the build results and a link to the repo where you can test it.

Publishing

Once you are satisfied with the new build you can trigger a publish operation, which will import the build into the main repository and do all the required operations, like:

  • Sign builds with GPG
  • Generate static deltas for efficient updates
  • Update the appstream data and screenshots for the repo
  • Generate flatpakref files for easy installation of apps
  • Update the summary file
  • Call out out scripts that let you do local customization

The publish operation is actually split into two steps, first it imports the build result in the repo, and then it queues a separate job to do all the updates needed for the repo. This way if multiple builds are published at the same time the update can be shared. This saves time on the server, but it also means less updates to the metadata which means less churn for users.

You can use whatever policy you want for how and when to publish builds. Flathub lets individual maintainers chose, but by default successful builds are published after 3 hours.

Delta generation

The traditional way to generate static deltas is to run flatpak build-update-repo --generate-static-deltas. However, this is a very computationally expensive operation that you might not want to do on your main repository server. Its also not very flexible in which deltas it generates.

To minimize the server load flat-manager allows external workers that generate the deltas on different machines. You can run as many of these as you want and the deltas will be automatically distributed to them. This is optional, and if no workers connect the deltas will be generated locally.

flat-manager also has configuration options for which deltas should be generated. This allows you to avoid generating unnecessary deltas and to add extra levels of deltas where needed. For example, Flathub no longer generates deltas for sources and debug refs, but we have instead added multiple levels of deltas for runtimes, allowing you to go efficiently to the current version from either one or two versions ago.

Subsetting tokens

flat-manager uses JSON Web Tokens to authenticate API clients. This means you can assign different permission to different clients. Flathub uses this to give minimal permissions to the build machines. The tokens they get only allow uploads to the specific build they are currently handling.

This also allows you to hand out access to parts of the repository namespace. For instance, the Gnome project has a custom token that allows them to upload anything in the org.gnome.Platform namespace in Flathub. This way Gnome can control the build of their runtime and upload a new version whenever they want, but they can’t (accidentally or deliberately) modify any other apps.

Rust

I need to mention Rust here too. This is my first real experience with using Rust, and I’m very impressed by it. In particular, the sense of trust I have in the code when I got it past the compiler. The compiler caught a lot of issues, and once things built I saw very few bugs at runtime.

It can sometimes be a lot of work to express the code in a way that Rust accepts, which makes it not an ideal language for sketching out ideas. But for production code it really excels, and I can heartily recommend it!

Future work

Most of the initial list of features for flat-manager are now there, so I don’t expect it to see a lot of work in the near future.

However, there is one more feature that I want to see; the ability to (automatically) create subset versions of the repository. In particular, we want to produce a version of Flathub containing only free software.

I have the initial plans for how this will work, but it is currently blocking on some work inside OSTree itself. I hope this will happen soon though.
Nvidia drivers in Fedora Silverblue

UPDATE:

The updated drivers packages are now in the repos, so you don’t need the specially built rpm. Using rpm-ostree install kmod-nvidia xorg-x11-drv-nvidia is enough. If you installed the custom build you need to uninstall it as it can cause upgrade issues.

I really like how Fedora Silverblue combines the best of atomic, image-based updates and local tweaking with its package layering idea.

However, one major issue many people has had with it is support for the NVIDIA drivers. Given they ares not free software they can’t be shipped with the image, so one imagines using package layering to would be a good way to install it. In theory this works, but unfortunately it often runs into issues, because frequent kernel updates cause there to be no pre-built nvidia module for your particular kernel/driver version.

In a normal Fedora installation this is handled by something called akmods. This is a system where the kernel modules ship as sources which get automatically rebuilt on the target system itself when a new kernel is installed.

Unfortunately this doesn’t quite work on Silverblue, because the system image is immutable. So, I’ve been working recently on making akmods work in silverblue. The approach I’ve taken is having the modules being built during the rpm-ostree update command (in the %post script) and the output of that being integrated into the newly constructed image.

Last week the final work landed in the akmods and kmodtools packages (currently available in updates-testing), which means that anyone can easily experiment with akmods, including the nvidia drivers.

Preparing the system

First we need the latest of everything:

$ sudo rpm-ostree update

The required akmods packages are in updates-testing at the moment, so we’ll enable that for now:

$ sudo vi /etc/yum.repos.d/fedora-updates-testing.repo
... Change enabled to 1 ..

Then we add the rpmfusion repository:

$ sudo rpm-ostree install https://download1.rpmfusion.org/free/fedora/rpmfusion-free-release-29.noarch.rpm https://download1.rpmfusion.org/nonfree/fedora/rpmfusion-nonfree-release-29.noarch.rpm

At this point you need to reboot into the new ostree image to enable installation from the new repositories.

$ systemctl reboot

Installing the driver

The akmod-nvidia package in the current rpm-fusion is not built against the new kmodtools, so until it is rebuilt it will not work. This is a temporary issue, but  I built a new version we can use until it is fixed.

To install it, and the driver itself we do:

$ sudo rpm-ostree install http://people.redhat.com/alexl/akmod-nvidia-418.43-1.1rebuild.fc29.x86_64.rpm xorg-x11-drv-nvidia

Once the driver in rpm-fusion is rebuilt the custom rpm should not be necessary.

We also need to blacklist the built-in nouveau driver so to avoid driver conflicts:

$ sudo rpm-ostree kargs --append=rd.driver.blacklist=nouveau --append=modprobe.blacklist=nouveau --append=nvidia-drm.modeset=1

Now you’re ready to boot into your fancy new silverblue nvidia experience:

$ systemctl reboot

What about Fedora 30/Rawhide?

All the changes necessary for this to work have landed, but there is no Fedora 30 Silverblue image yet (only a rawhide one), and the rawhide kernel is built with mutex debugging which is not compatible with the nvidia driver.

However, the second we have a Fedora 30 Silverblue image with a non-debug kernel the above should work there too.

Changes in Flathub land

The last month or so we’ve been working in the background on a major update to the Flathub infrastructure. This has been available for testing for a while, but this week we finally enabled it on the live system. There are some pretty cool internal changes, including a new repo manager microservice written in rust. Later blog posts will talk about some of the technical details, but for now I’ll just talk about the user visible changes.

Power to the maintainers!

Flathub uses buildbot to to manage the builds, and we have updated and customized the UI a bit to be nicer for maintainers. For example, we now have a page listing all the apps ever built, with links to per-app pages showing builds of that app.

We also integrated GitHub authentication so that maintainers of individual applications automatically have authority to do operations on their own apps and builds. For example, the home and per-app pages have buttons that let you start builds, which anyone with write permissions to the corresponding GitHub repository can use. Also, similarly they can cancel or retry the builds of their own apps. Previously you had to ask a Flathub administrator to restart or cancel a build, but no more!

New publish workflow

There has also been a major change in the workflow for builds. It used to be the case that a successful build was immediately imported into the repository and was then available to users. Now instead, a successful build is available for installation in a test-repository. The build system will display a link to it so that you can easily install and test the build results. When you’re satisfied that the build is ok you can then manually push a button to export it to the public repository.

If you don’t manually publish the build, then it will be automatically published, by default after 24 hours, but this is configurable by the app maintainer. See the wiki for details.

Testing the test builds

Test builds used to only verify that the app built, but with the new system they get built into test repositories just like regular builds. This means you can actually install and test the builds, for example from a pull request against your application. Such test repos stay around for 5 days, or until you explicitly delete then in the build web UI.

Test builds are also more useful now due to the permission work, as developers can easily create or cancel them from the web ui, or by using the “bot, build” command in a GitHub issue, without needing help from the Flathub admins.

Also, test builds started from a GitHub issue gets nice comments pointing to the test build and the build result. Here is an example of a pull request with automatically built tests showing how this looks.

We now automatically queue test builds for all new PRs, although such builds are less prioritized than regular builds (for resource reasons) and can take a while to start.

Publish beta releases!

In addition to the existing stable repository Flathub added a repository for beta builds. Exactly if and how this is used is up to each individual application maintainer, but the goal of this is to have a way for developers to get early releases of new stable versions into the hand of regular users.

This isn’t meant to be used for nightly builds, but for releases that has some level of testing and are expected to mostly work and be usable to non-developer end-users.

The way this works is that each GitHub repository builds the master branch for the stable repository, which will have the flatpak branch name “stable”, and then the beta git branch will build into the beta repository with the flatpak branch “beta”.

As a user, the beta channel looks like a separate remote. First you configure it as a remote:

$ flatpak remote-add flathub-beta https://flathub.org/beta-repo/flathub-beta.flatpakrepo

And then you can install any apps from it:

$ flatpak install --user flathub-beta org.godotengine.Godot

Alternatively, you can use a flatpakref, which are generated for each app:

$ flatpak install https://flathub.org/beta-repo/appstream/org.godotengine.Godot.flatpakref

The above Godot example is the latest beta of Godot 3.1, whereas the stable repo still contains 3.0. You can see how this beta build is set up in GitHub.

If you install both the beta and the stable version of an app then they will be installed in parallel. However, only one will be showed in the menus. You can switch which one is currently showed like this:

$ flatpak make-current org.godotengine.Godot [beta|stable]

But from the command line you can always start any installed version explicitly, like this:

$ flatpak run --branch=beta org.godotengine.Godot
or
$ flatpak run org.godotengine.Godot//beta

Now, go build some betas!

Moving away from the 1.6 freedesktop runtime

A flatpak runtime contains the basic dependencies that an application needs. It is shared by applications so that application authors don’t have to bother with complicated low-level dependencies, but also so that these dependencies can be shared and get shared updates.

Most flatpaks these days use the freedesktop runtime or one of its derivates (like the Gnome and KDE runtimes). Historically, these have been using the 1.6 version of the freedesktop runtime which is based on Yocto.

The 1.6 runtime has served its place to kickstart flatpak and flathub well, but it is getting quite long in the tooth. We still fix security issues in it now and then, but it is not seeing a lot of maintenance recently. Additionally, not a lot of people know enough yocto to work on it, so we were never able to build a larger community around it.

However, earlier this summer a complete reimplementation, version 18.08, was announced, and starting with version 3.30 the Gnome runtime is now based on it as well, with a KDE version is in the works. This runtime is based on BuildStream, making it much easier to work with, which has resulted in a much larger team working on this runtime. Partly this is due to the awesome fact that Codethink has several people paid to work on this, but there are also lots of community support.

The result is a better supported, easier to maintain runtime with more modern content. What we need to do now is to phase out the old runtime and start using the new one in apps.

So, this is a call to action!

Anyone who maintains a flatpak application, especially on flathub, please try to move to a runtime based on 18.08. And if you have any problems, please report them to the upstream freedesktop-sdk project.

Flatpak on windows

As I teased about last week I recently played around with WSL, which lets you run Linux applications on Windows. This isn’t necessarily very useful, as there isn’t really a lack of native applications on Windows, but it is still interesting from a technical viewpoint.

I created a wip/WSL branch of flatpak that has some workarounds needed for flatpak to work, and wrote some simple docs on how to build and test it.

There are some really big problems with this port. For example, WSL doesn’t support seccomp or network namespaces which removes some of the utility of the sandbox. There is also a bad bug that makes read-only bind-mounts not work for flatpak, which is really unsafe as apps can modify themselves (or the runtime). There were also various other bugs that I reported. Additionally, some apps rely on things on the linux host that don’t exist in the WSL environment (such as pulseaudio, or various dbus services).

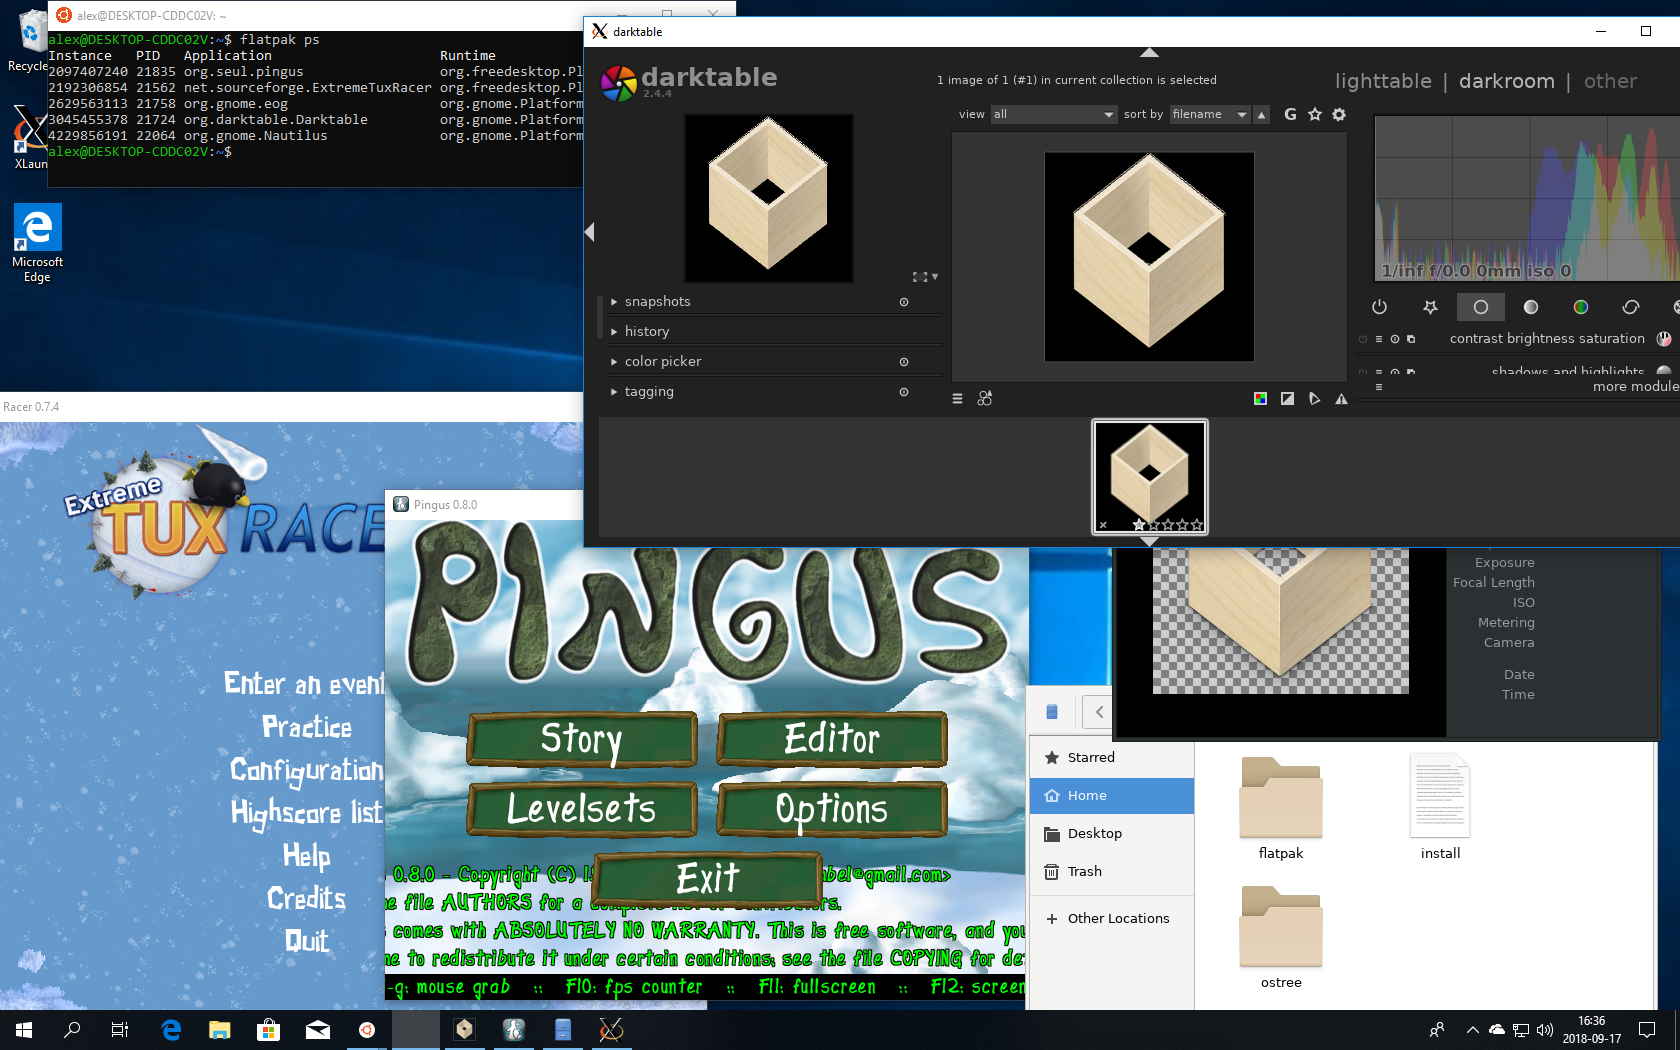
Still, its amazing that it works as well as it does. I was able to run various games, gnome and kde apps, and even the linux versions of telegram. Massive kudos to the Microsoft developers who worked on this!

I know you crave more screenshots, so here is one:

Kick-starting the revolution 1.0

Yesterday marked the day when we finally released Flatpak 1.0 (check out the release video!). I want to thank everyone who helped make this a reality, from writing code, to Flathub packaging, to just testing stuff and spreading the word. Large projects like this can’t be done by a single person, its all about the community.

With 1.0 out, I expect the rate of change in Flatpak itself to slow down. Going forward the focus will be more on the infrastructure around it. Things like getting 1.0 into all distributions, making portals work well, ensuring Flathub works smoothly and keeps growing, improving our test-suites and working on the runtimes.

Most of my blog posts are about technical details, but the reason for the existence of Flatpak is not technical. I created flatpak because the Linux application desktop ecosystem is fundamentally broken. As a app developer you have no sane way to distribute the result of your work to users.

Unless you have massive resources, the only realistic way is to wait for distributions to pick up your app. However, there are many problems with this. First of all, not all distros pick up all apps, and even if they do they often wait until the app is well known leading to a chicken-and-egg problem for new apps. And when they finally ship it you have no control of what version is shipped, or when it is updated.

This is a real problem! For instance, maybe some web service it uses changed API. Its a quick fix for your app, but it takes a long time before it propagates to distros. In fact many stable distros never ever update to new versions.

This model leads to a disconnect between the developer and the users. Users file bugs against older versions, about bugs that are already fixed, yet don’t get any fixes. Developers add new features that users can’t use, and get no feedback on them.

With Flatpak, the goal is for the upstream developer to have control of updates. If the developer fixes an important bug, a new stable version is released that users can immediately use. Any bugs filed will be against the latest stable version, so they are not stale, and once the bug report is closed the user will actually get the fix. That means reporting bugs is useful to the user. Similarly, any new feature development will get immediate feedback, and user feedback will be based on the current state of the app.

This kind of virtuous cycle helps improving both speed of development and software quality. My hope is that this in turn will increase the interest in writing native Linux applications and trigger a revolution, leading to the YEAR OF THE LINUX DESKTOP! (ahem)