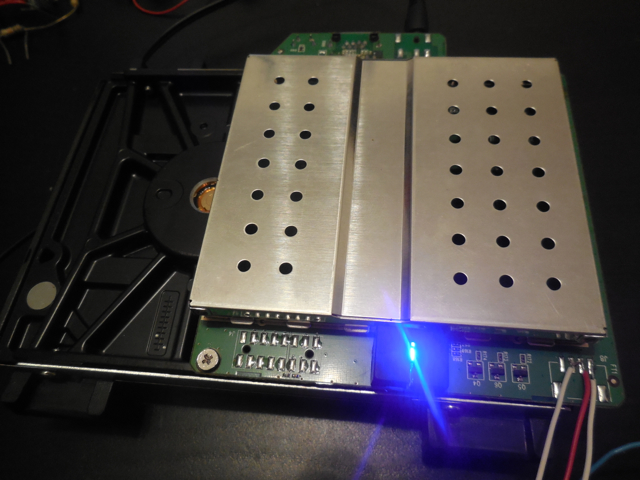
Some while ago, I bought a WD Live (2T) type of NAS for use as a media server/backup storage at home. From various other solutions for running this type of thing, I was pretty happy with the WD Live. It’s compact, silent and it runs Debian (lenny)! It also doesn’t try to lock you out, you can enable SSH access from the web interface easily and from that point on you can do with the box what you want. That’s pretty great no?
And pretty great it was. Everything worked out of the box. The only output the WD Live has is an ethernet port, so you just hook it into your router and you’re done. The Twonky media server that’s installed on it can be a bit slow if you ask me, especially when it starts to index on boot, but otherwise streaming to the PS3 (for example) works perfectly. That is, until a power outage managed to brick it.
The fail
Basically, although it would start to turn on and you could hear the disk spinning, it wasn’t booting. Actually, it was rebooting automatically about every 10 seconds. At this point you’re kind of out, you only have access to the ethernet on the box. At this point I saw two options, 1) bring it back and get it “repaired” or 2) put on the DIY hat and start tinkering. Fully expecting that going with 1) would loose me all my data and that it could be fun/satisfactory to go with 2), I opened the box.
My initial guess was that the disk somehow got corrupted by the outage. I verified this by looking online and seeing it was a not-uncommon problem with the device. Once opened, it’s easy to take out the standard SATA HD. So I bought a new 2TB disk and started the data recovery.
Recovering the data
I used ddrescue to rescue data from the old disk to the new disk. ddrescue is a really great tool which tries several strategies for recovering data and you can run it such that it first try to rescue large regions and then have it retry failed regions in smaller increments (great if the disk is failing and you need to rescue as much as possible as fast as possible). It turned out that I only had a small number of errors on the disk, nevertheless it took ddrescue a few days to go through the whole 2TB.
After the rescue, I wanted to see which files got corrupted. This turned out pretty problematic. ddrescue doesn’t know anything about filesystems, it just sees the HD as a big block device. The problem is that the WD Live is a PPC architecture and the data partition of the HD (for whatever reason) has a block size of 65k. This turns out to be a problem because on x86 (at least with the default linux kernel) only block sizes up to 4k (the maximum page size) are supported. So basically, I couldn’t mount my data partition and check for problems.
After some thinking, I couldn’t really come up with a solution, but I didn’t want to jam the new HD back without knowing if some files were damaged. In the end, I managed to find an old G5/PPC in the lab and I could hook up the drives and mount them! I used ddrescue logs to zero out the parts of the new disk corresponding to the damaged parts of the old disk. After that, I simply ran an md5sum on the whole system for both disks and did a diff to see which files were corrupted. Luckily, it turned out that non of the system files were corrupted (just some of my personal data).
Feeling pretty confident that the new HD would boot, I plugged it back into the WD Live and started it up. This time it started of doing better, it didn’t reboot right away and seemed to certainly do some stuff (the HD was purring along). However, HD activity stopped after about 15 seconds and I still didn’t get network access. At this point I was kind of ready go give up. I couldn’t access any visible ports on the board. I couldn’t really debug anything. Maybe some of the boards hardware got fried? Or maybe the HD was not restored completely correctly? No way of knowing really. So I stowed the thing on a shelf and went on with other things.
The unbrick
Until yesterday enough time had passed for me to wanting another go at it. I was wondering if there wasn’t any way to get access to the device. The most obvious idea being to connect somehow a serial console to it. So I checked online, and low and behold! There actually is a serial output on the WD Live (http://mybookworld.wikidot.com/wd-mybook-live-uart). Ok so cool. Only, I don’t have anything with a serial port to connect it with. I would basically need to have a serial TLL to USB converter thingie, which I also didn’t have. Now, of course, I could have just bought the converter, but where is the fun in that. What I do have though is some Arduino’s, soldering iron and a breakout board.
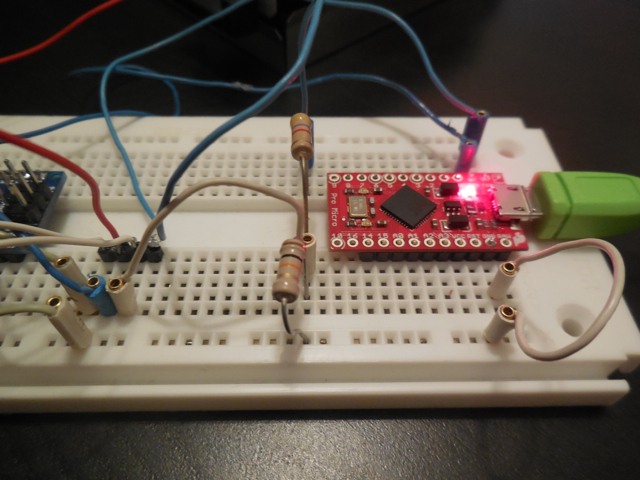
The idea is to use the Arduino as a serial TTL <-> USB converter. I started with the Arduino Nano that I had already setup in a previous project. One thing you have to watch out for is that the WD Live UART port uses 3.3V TTL, while the Arduino Nano uses 5V. Although 3.3V is usually enough to be considered high even for a 5V reference, you shouldn’t try to set 5V on a 3.3V receiver. This basically means that you should drop the voltage from the Nano TX to the WD Live RX from 5V to 3.3V. You can achieve this by using a simple voltage divider, which you can create using two simple resistors of the right value. As chance had it, I actually still had the exact circuit that I needed for this because I was testing the Arduino Nano with a HC-05 bluetooth module. The HC-05 also uses 3.3V TTL UART so I could just replace the HC-05 with the WD Live in my circuit and voila!
The problem is that the Nano hardware UART is used by the USB. So what I did was to use the SoftwareSerial library for the Arduino to create a software (instead of hardware) based serial port on two digital pins of the board. The problem here is that the WD Live UART is configured for a 115200 baud rate. The Arduino Nano however is a 16MHz processor and unfortunately it isn’t able to run the software serial fast enough for 115200. When I hooked it up therefore, what I saw was half garbled output from the WD Live boot. I could recognise parts of the boot sequence, but especially when there was a lot of output, all of it got garbled. More importantly, this was the case when the boot got stuck. So now I had a basic working setup, almost there. But I still couldn’t see what went wrong with the boot!
Luckily, I also recently bought an Arduino micro pro from Sparkfun. It has some similar features as the Nano (and ironically is actually smaller), but importantly, it has a separate hardware UART from the USB. So I simply switched out the Nano for the Micro and used Serial1 instead of SoftwareSerial. I used this trivial Arduino program:
void setup() {
    // Initialize serial port for USB communication to host
    Serial.begin(115200);

    // Initialize serial port for communication with the WD live
    Serial1.begin(115200);
}
void loop() {
    if (Serial.available() > 0) {
        Serial1.write(Serial.read());
    }

    if (Serial1.available() > 0) {
        Serial.write(Serial1.read());
    }
}

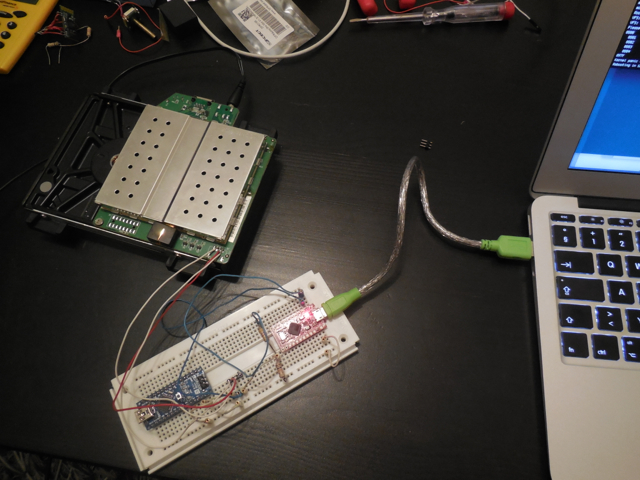
Complete setup including WD Live, Arduino and laptop. The Arduino Nano is on the board but not actually connected.
And that is the complete setup. Tinker worthy I would say. And finally, starting the WD Live now gets me the boot sequence on the console! Yay! I use GNU screen to connect to the serial console on the laptop, which is pretty convenient. So what happens at the boot? Turns out I get to see this:
md127: WARNING: sda2 appears to be on the same physical disk as sda1.
True protection against single-disk failure might be compromised.
raid1: raid set md127 active with 2 out of 2 mirrors
md127: detected capacity change from 0 to 2047803392
md: ... autorun DONE.
Root-NFS: No NFS server available, giving up.
VFS: Unable to mount root fs via NFS, trying floppy.
VFS: Cannot open root device "md1" or unknown-block(2,0)
Please append a correct "root=" boot option; here are the available partitions:
0800 2930266584 sda driver: sd
 0801 1999872 sda1
 0802 1999872 sda2
 0803 500736 sda3
 0804 2925750727 sda4
097f 1999808 md127 (driver?)
Kernel panic - not syncing: VFS: Unable to mount root fs on unknown-block(2,0)
Rebooting in 180 seconds..
Turns out that for whatever reason, the new disk is being assembled as /dev/md127, while the kernel is booted using root=/dev/md1. It then fails later on trying to mount the root partition. Sigh.
Fixing the boot
The WD Live uses U-boot as the boot loader. I wasn’t familiar with it but the basics are pretty straightforward. When booting, you have about 1 second early on to press a key to get into the U-boot console. Once in the console, I wasn’t really sure what to do. I was looking at how to change the root= kernel parameter. So I checked with printenv to see what commands were being run by U-boot. Basically, what it would do is “mount” the disk, then read the file /boot/boot.scr (which is a u-boot script file) to a memory location (using ext2load) and then run that memory location (using source). To see what boot.scr was doing, I used ‘md 100000 100’ to dump the contents of boot.scr (which got loaded at memory location 100000). This finally showed the actual U-boot commands that were used to boot the kernel, and hardcoded into it root=/dev/md1! To bootstrap, I simply executed the relevant parts of the script, changing root=/dev/md1 to root=/dev/md127:
sata init
ext2load sata 1:1 ${kernel_addr_r} /boot/uImage
ext2load sata 1:1 ${fdt_addr_r} /boot/apollo3g.dtb
setenv bootargs root=/dev/md127 rw rootfstype=ext3
run addtty
bootm ${kernel_addr_r} - ${fdt_addr_r}
After bootm I finally got the WD Live booted correctly, and everything just worked after that! Now the only remaining problem is how to make the fix permanently. Initially, I wanted to make the disk being mounted at /dev/md1. This would be the nicest option, but I couldn’t figure out how to update the super-minor id (which is what is used to decide the /dev point, changeable using mdadm –assemble –update=super-minor /dev/md1….) on the root partition while it is mounted. The second option then was to update the /boot/boot.scr file to set root=/dev/md127. So that’s what I did. The boot.scr file is some kind of binary file, but it seems that there is just some binary magical header in front of otherwise ASCII text composing the actual U-boot script. Taking the text part of boot.scr and putting it into boot.cmd, you can then use:
mkimage -A arm -O linux -T script -C none -a 0 -e 0 -n 'Execute uImage' -d boot.cmd boot.scr
To create the corresponding boot.scr file. You’ll need to intstall the uboot-mkimage package to get the mkimage command, but that’s it.
In conclusion
Phew, pretty long post. If you’re here after reading it all, congrats! I’m happy to say that the box seems to be working well again and the solution gave me some personal satisfaction that even in current days, you can still fix things yourself and tinkering is still worth something. In the end I guess it would have been cheaper/easier to just buy a new WD Live, but I ask you, where is the fun/spirit in that?


