Continues Integration in Librsvg, Part 3

Caching stuff

Generally 5min/job does not seem like a terribly long time to wait, but it can add up really quickly when you add couple of jobs to the pipeline. First let’s take a look where most of the time is spent. First of jobs currently are spawned in a clean environment, which means each time we want to build the Rust part of librsvg, we download the whole cargo registry and all of the cargo dependencies each time. That’s our first low hanging fruit! Apart from that another side-effect of the clean environment is that we build librsvg from scratch each time, meaning we don’t make use of the incremental compilation that modern compilers offer. So let’s get started.

Cargo Registry

According to the cargo docs there’s a cache of the registry is stored in $CARGO_HOME(default under $HOME/.cargo). Gitlab-CI though only allows you to cache things that exists inside your projects root (it does not need to be tracked by git). So we have to somehow relocate $CARGO_HOME somewhere where we can extract it. Thankfully that’s as easy as setting $CARGO_HOME to our desired path.

.test_template: &distro_test
  before_script:
    - mkdir -p .cargo_cache
    # Only stuff inside the repo directory can be cached
    # Override the CARGO_HOME variable to force it location
    - export CARGO_HOME="${PWD}/.cargo_cache"
  script:
    - echo foo
 
  cache:
    paths:
      - .cargo_cache/

What’s new in our template above compared to part 1, are the before_script: and cache: blocks. In the before_script: first we create the .cacrgo_cache folder if it not exists (cargo is probably smart enough to not need this but ccache isn’t! So better be safe I guess). And then we export the new $CARGO_HOME location. Then in the cache: block we set what folder we want to cache. That’s it, now our cargo registry and downloaded crates should persist across builds!

Caching Rust Artifacts

The only thing needed to cache the rustc build artifacts is to add target/ in the cache: block. That’s it I am serious.

cache:
  paths:
    - target/

Caching C Artifacts with ccache

C and ccache on the other hand are a completely different story sadly. To that it did not contribute that my knowledge of C and build systems is approximating 0. Thankfully while searching I found another post from Ted Gould where he describes how ccache was setup for Inkscape.  The following config ended up working for librsvg‘s current autotools setup.

.test_template: &distro_test
  before_script:
    # ccache Config
    - mkdir -p ccache
    - export CCACHE_BASEDIR=${PWD}
    - export CCACHE_DIR=${PWD}/ccache
    - export CC="ccache gcc"

  script:
    - echo foo
  cache:
    paths:
      - ccache/

I got stuck on how to actually call gcc through ccache since it depends on the build system you use (see export CC). Shout out to Christian Hergert for showing me how to do it!

Cache behavior

One last thing, is that we want our each of our job to have an independent cache as opposed to a shared one across the pipeline. This can be achieved by using the key: directive. I am not sure how it works and I wish the jobs would elaborate a bit more. In practice the following line will make sure that each job on each branch will have it’s own cache. For more complex configurations I suggest looking at the gitlab docs.

cache:
    # JOB_NAME - Each job will have it's own cache
    # COMMIT_REF_SLUG = Lowercase name of the branch
    # ^ Keep different caches for each branch
    key: "$CI_JOB_NAME-$CI_COMMIT_REF_SLUG"

Final config and results

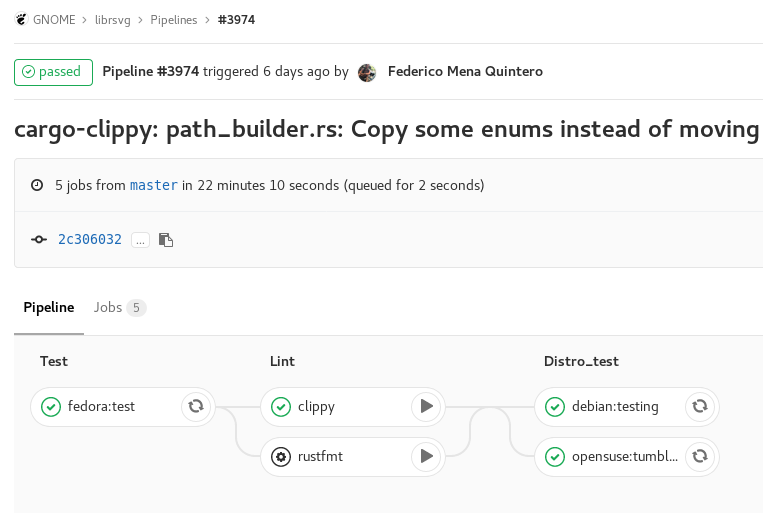
So here is the cache config as it exists today on Librsvg‘s master branch. This brought build of each job from ~4-5min, which we left it in part 2, to ~1-1:30min. Pretty damn fast! But what if you wanted to do a clean build or rule the out the possibility that the cache is causing bugs and failed runs? Well if you happen to use gitlab 10.4 or later (and GNOME is) you can do it from the Web GUI. If not you probably have to contact a gitlab administrator.

.test_template: &distro_test
  before_script:
    # CCache Config
    - mkdir -p ccache
    - mkdir -p .cargo_cache
    - export CCACHE_BASEDIR=${PWD}
    - export CCACHE_DIR=${PWD}/ccache
    - export CC="ccache gcc"

    # Only stuff inside the repo directory can be cached
    # Override the CARGO_HOME variable to force it location
    - export CARGO_HOME="${PWD}/.cargo_cache"
  script:
    - echo foo

  cache:
    # JOB_NAME - Each job will have it's own cache
    # COMMIT_REF_SLUG = Lowercase name of the branch
    # ^ Keep diffrerent caches for each branch
    key: "$CI_JOB_NAME-$CI_COMMIT_REF_SLUG"
    paths:
      - target/
      - .cargo_cache/
      - ccache/

Continues Integration in Librsvg, Part 2

Custom Images for everyone!

In the previous post we setup a small Pipeline that builds and runs the tests suite across some distributions, checks the code formatting  and(Soon™) will deny clippy warnings.

In this part we will try to reduce the time it takes for the Pipeline to run by using custom container images bundled with the dependencies needed to built Librsvg instead of downloading and installing them each time.

Creating an image

First we will need to find a base image of the distro we want to build upon. Most distributions have official images published in Dockerhub. I am gonna use the fedora image but the same process can be done for any image.

We will create a new file named fedora_latest.yml, but the name doesn’t really matter. Then add the following content to it:

FROM fedora:latest

RUN dnf -y update && dnf -y upgrade && \
dnf install -y gcc rust rust-std-static cargo make vala \
automake autoconf libtool gettext itstool \
gdk-pixbuf2-devel gobject-introspection-devel \
gtk-doc git redhat-rpm-config gtk3-devel ccache \
libxml2-devel libcroco-devel cairo-devel pango-devel && \
dnf clean all

The first line FROM fedora:latest specified the base image we will use. The first part specifies the repository it will come from fedora, if no registry is passed it will by default look in Dockerhub I think.

Then in the rest of the file we gonna use the standard dnf commands to install the dependencies we want.

Last we will need to build the image with the following command:

docker build -f fedora_latest.yml -t librsvg/fedora:latest .

Notice the dot at the end. That cost me half an hour to debug the first time 🙁 (I would suggest looking at buildah for building OCI images instead of docker).

After that is complete docker images should have an entry like the following:

REPOSITORY        TAG       IMAGE ID        CREATED          SIZE
librsvg/fedora    latest    3d92c1b0ea5a    6 minutes ago    992 MB

It’s now possible to emulate the environment the Gitlab CI with the following command:

docker run -ti librsvg/fedora:latest bash

This will give as a bash shell inside the image we just built from where we can test cloning the git repo and running the test suite. I plan on writing a separate post on how to use the containers we are going to build for compiling and testing librsvg in a bit more depth.

Pushing our image to a registry

We built our image now we need some way for the Gitlab CI to fetch it and use it. One way is to push it in an online registry like Dockerhub. Ideally though we want to avoid depending Dockerhub or any other(possibly proprietary) registry that we have no control off. Turns out gitlab can have an integrated container registry FOR EACH PROJECT.

As of the time of writing this post, the GNOME gitlab migration is still ongoing and the container registry is not yet enabled. I plan on migrating the librsvg-oci-registry from gitlab.com as soon as the feature becomes available. For now and the rest of the post I will make use of the gitlab.com infrastructure but migrating or replicating the setup in the gitlab deployment of your choice(ex. gitlab.gnome.org or salsa.debian.org)  should be identical apart from changing the base urls.

The only prerequisite to use the gitlab registry(apart from being enabled) is to have a gitlab project(a repository by Github terms). I’ve created the a new project under my gitlab.com account called librsvg-oci-images. When navigating to the Repository section(in the left bar in gitlab 10.x series) the following instructions are shown.

docker login registry.gitlab.com

Once you log in, you’re free to create and upload a container image using the common build and push commands

docker build -t registry.gitlab.com/alatiera/librsvg-oci-images . 
docker push registry.gitlab.com/alatiera/librsvg-oci-images

Assuming you rebuilt the image with a tag that matches the registry’s namespace, that’s all it takes to push an image to it.

Automating Image builds

Building an image and pushing it manually can get tiresome and a long time (especially on slow internet connections). What if we could use Gitlab-CI to build and push the images automatically on regular basis?

It certainly possible, in fact there’s even a whole section about it in the gitlab docs. I’ve also found useful this post from .

First we will commit the fedora.yml file we created earlier to the repo. Then will need to add a .gitlab-ci.yml file in the librsvg-oci-images repository. For now we will just put the following to assert it’s working.

variables:
  FEDORA_LATEST: ${CI_REGISTRY}/${CI_PROJECT_NAMESPACE}/${CI_PROJECT_NAME}/fedora:latest

build:
  image: docker:latest
  services:
    - docker:dind
  stage: build
  script:
    - docker login -u ${CI_REGISTRY_USER} -p ${CI_REGISTRY_PASSWORD} ${CI_REGISTRY}
    - docker build --pull -f cross-distro-images/fedora_latest.yml -t ${FEDORA_LATEST} .
    - docker push ${FEDORA_LATEST}

Gitlab-CI set’s up some ENV variables on every run, which we can use to login and push to the registry. It’s almost a carbon copy of the examples in the gitlab docs. Though for now we’ve hardcoded the path the fedora Dockerfile yaml file(currently under cross-distro-images folder in the repo). If this works the resulting image will be under registry.gitlab.com/alatiera/librsvg-oci-images/fedora:latest.

Indeed the pipeline was successful and we can pull our new image with the following command:

docker pull registry.gitlab.com/alatiera/librsvg-oci-images/fedora:latest

Alright, now that this works let’s add the rest of the images we want to build and refactor the .gitlab-ci.yml file a bit.

First we will add some more dockerfiles in the cross-distro-images folder in the repository root.

Then I will fast-forward a bunch of failed attempts to get this working. Eventually our .gitlab-ci.yml will look something like this:

stages:
  - distro_image

# Expects $DISTRO_NAME variable which should be the name of the distro image ex. ubuntu
# Expects $DISTRO_VER variable which should be the version distro image ex. 18.04
# Expects $OCI_YML variable which should be the path to the dockerfile
.distro_template: &distro_build
  before_script:
    - export IMAGE=${CI_REGISTRY}/${CI_PROJECT_NAMESPACE}/${CI_PROJECT_NAME}/${DISTRO_NAME}:${DISTRO_VER}
  script:
    - docker login -u ${CI_REGISTRY_USER} -p ${CI_REGISTRY_PASSWORD} ${CI_REGISTRY}
    - docker build --pull -f ${OCI_YML} -t ${IMAGE} .
    - docker push ${IMAGE}
  allow_failure: true

fedora:latest:
  variables:
    DISTRO_NAME: "fedora"
    DISTRO_VER: "latest"
    OCI_YML: "cross-distro-image/fedora_latest.yml"

  <<: *distro_build

fedora:rawhide:
  variables:
    DISTRO_NAME: "fedora"
    DISTRO_VER: "rawhide"
    OCI_YML: "cross-distro-image/fedora_rawhide.yml"

  <<: *distro_build

debian:testing:
  variables:
    DISTRO_NAME: "debian"
    DISTRO_VER: "testing"
    OCI_YML: "cross-distro-image/debian_testing.yml"

  <<: *distro_build

opensuse:tumbleweed:
  variables:
    DISTRO_NAME: "opensuse"
    DISTRO_VER: "tumbleweed"
    OCI_YML: "across-distro-image/opensuse_tumbleweed.yml"

  <<: *distro_build

Basically what happened is that we made a generic template and used Environment Variables to pass it the arguments we want in each case. Here is the result after we push the file and the pipeline is run.

And here is how the registry looks like:

Now the only thing that’s left is to switch librsvg pipeline to use the custom images instead. To do so we simply have to change the image: key and delete the before_script: that used installed dependencies before since they are now included in the image.

So from this:

fedora:latest:
  image: fedora:latest

  before_script:
    - dnf install -y gcc rust ...  gtk3-devel
 <<: *distro_test

It will become like this:

fedora:latest:
  image: registry.gitlab.com/alatiera/librsvg-oci-images/fedora:latest

 <<: *distro_test

Automatically rebuilding and updating the Images

On each commit now the Gitlab-CI will build and push to the registry new images. But Gitlab-CI also has a nice feature where you can schedule Pipelines to run on regular time intervals. So we can have for example weekly/monthly rebuilds of updated images without having to push new commits or trigger manual rebuilds. When a new image is pushed the downstream CI in librsvg that uses the image should automatically pick it up. So that means as long the image builds don’t fail we won’t need to ever touch the repo again.

Setting up a scheduled Pipeline is straight forward for the most part. (They though cron-like syntax would make a good UX…). I won’t go into detail since there’s seem to be good documentation on howto do it in the Gitlab docs here.

Conclusion and Results

Using custom images and avoiding downloading and installing package dependencies in each run brought down the opensuse Job from ~20 min to ~5 minutes, and the fedora/debian jobs from ~10 minutes to ~4 minutes.

Which means we can run all the cross distro jobs now in less time than it initially took us to just test an opensuse build and still have some spare time!

Though we still download the whole cargo registry and all the rust dependencies each time. We also build librsvg from scratch in each pipeline run. In the next part we will see how to cache C and Rust artifacts across builds and have essentially do incremental builds.

Here is a link to the librsvg container registry, currently hosted at gitlab.com, if you want to take a closer look of the repo. Some stuff may be slightly different.

Continues Integration in Librsvg, Part 1

The base setup

Rust makes it trivial to write any kind of tests for your project. But what good are they if you do not run them? In this blog series I am gonna explore the capabilities of Gitlab-CI and document how it is used in Librsvg.

First things first. What’s CI? It stands for Continues integration, basically it makes sure what you push in your repository continues to build and pass the tests. Even if someone committed something without testings it, or the tests happened to pass on their machine but not but not in a clean environment, we can know without having to clone and built manually.

CI also can have other uses, like enforcing a coding style or running resource heavy tests.

What’s Librsvg?

As the README.md file puts it.

It’s a small library to render Scalable Vector Graphics(SVG), associated with the GNOME Project. It renders SVG files to Cairo surfaces. Cairo is the 2D, antialiased drawing library that GNOME uses to draw things to the screen or to generate output for printing.

Basic test case

First of all we will add a .gitlab-ci.yml file in the repo.

We will start of with a simple case. A single stage and a single job. A job, is a single action that can be done. A stage is a collection of jobs. Jobs of the same state can be run in parallel.

Minor things were omitted, such as the full list of dependencies. The original file is here.

stages:
  - test

opensuse:tumbleweed:
  image: opensuse:tumbleweed
  stage: test

  before_script:
    - zypper install -y gcc rust ... gtk3-devel

  script:
    - ./autogen.sh --enable-debug
    - make check

Line, 1 and 2 define the our stages. If a stage is defined but has no jobs attached it is skipped.

Line 3 defines our job, with the name opensuse:tumbleweed.

Line 4 will fetch the opensuse:tumbleweed OCI image from dockerhub.

In line 5 we specify that that job is part of the test stage that we defined in line 2.

before_script: is something like a setup phase. In our case we will install our dependencies.

after_script: accordingly is what runs after every job including failed ones. We are not going to use it yet though.

Then in line 11 we will write our script. The commands that would have to be run to build librsvg like if we where to do it from a shell. Indeed the script: part is like a shell script.

If everything went well hopefully it will look like this.

Testing Multiple Distributions

Builds on opensuse based images work, but we can do better. We can test multiple distros!

Let’s add Debian testing and Fedora 27 builds to the pipeline.

fedora:latest:
  image: fedora:latest
  stage: test

  before_script:
    - dnf install -y gcc rust ...  gtk3-devel

  script:
    - ./autogen.sh --enable-debug
    - make check

debian:testing:
  image: debian:testing
  stage: test

  before_script:
    - apt install -y gcc rust ... libgtk-3-dev

  script:
    - ./autogen.sh --enable-debug
    - make check

Similar to what we did for opensuse. Notice that the only things that change are the names of the container images and the before_script:

specific to each distro’s package manager. This will work even better when we add caching and artifacts extractions into the template. But that’s for a later post.

We could refactor the above by using a template(yaml anchors). Here is how our file will look like after that.

stages:
  - test

.base_template: &distro_test
  stage: test

  script:
    - ./autogen.sh --enable-debug
    - make check

opensuse:tumbleweed:
  image: opensuse:tumbleweed
  before_script:
     - zypper install -y gcc rust ... gdk-pixbuf-devel gtk3-devel
  <<: *distro_test

fedora:latest:
  image: fedora:latest
  before_script:
    - dnf install -y gcc rust ... gdk-pixbuf-devel gtk3-devel
  <<: *distro_test

debian:testing:
  image: fedora:latest

  before_script:
    - dnf install -y gcc rust ... gdk-pixbuf-devel gtk3-devel
  <<: *distro_test

And Failure :(. I mean Success!


* Debian test was added later

Apparently the librsvg test-suite was failing on anything other than opensuse. Later we found out that this was the result of freetype being a bit outdated on the system Federico used to generate the reference “good” result. In Freetype 2.8/2.9 there was a bugfix that affected how the test cases were rendered. Thankfully this wasn’t librsvg‘s code misbehaving but rather a bug only in the test-suite. After regenerating the reference results with a newer version of Freetype everything worked.

Adding Rust Lints

Rust has it’s own style formatting tool, rustfmt, which is highly configurable. We will use it to make sure our codebase style stays  consistent. By adding a test in the Gitlab-CI we can be sure that Merge Requests will be properly formatted before reviewing and merging them.

There’s also clippy! An amazing collection of a bunch of lints for Rust code.  If we would have used it sooner it would probably have even caught a couple bugs  occurring when comparing floating point numbers. We haven’t decide yet on what lints to enable/deny, so it has a manual trigger for now and won’t be run unless explicitly triggered by someone. I hope that will change Soon™.

First we will add another test stage called lint.

stage:
  - test
  - lint

Then we will add 2 jobs. One for each tool. Both tools require the rust nightly toolchain of the compiler.

# Configure and run rustfmt on nightly toolchain
# Exits and builds fails if on bad format
rustfmt:
  image: "rustlang/rust:nightly"
  stage: lint

  script:
    - rustc --version && cargo --version
    - cargo install rustfmt-nightly --force
    - cargo fmt --all -- --write-mode=diff

# Configure and run clippy on nightly toolchain
clippy:
  image: "rustlang/rust:nightly"
  stage: lint
  before_script:
    - apt update -yqq
    - apt-get install -y libgdk-pixbuf2.0-dev ... libxml2-dev

  script:
    - rustc --version && cargo --version
    - cargo install clippy --force
    - cargo clippy --all
  when: manual

**

And that’s it, with the only caveat that it would take 40-60min for each  pipeline run to complete. There are couple of ways this could be sped up though, which will be the topic of part2 and part3.

** During the first experiments, rustfmt was set as a manual trigger(enabled by default later) and cross-distro tests were grouped to their own stage. But it’s functional identical to the setup described in the post.