Observer Pattern in Javascript Asynchronous Generators

One of the more recent additions to the Javascript specification is the asynchronous generator protocol. This is an especially useful pattern when you want to consume data off a socket/serial port etc., because it lets you do something like so:

for await (const buffer of readable) {
    await writable.write(buffer);
}

Which is pretty cool, but not a huge improvement on the `pipe` functionality already exposed in Node streams.

Where it really shines is the ability to also yield observations, allowing you to build an observer pattern:

async * download(writable) {
  await this.open();

  try {
    const readable = this.readSectors(...);
    let counter = 0;

    for await (const buffer of readable) {
      const buffer = SECTOR.parse(buffer);
      await writable.write(buffer);

      counter++;
      yield counter;
    }

  } finally {
    await this.close();
  }
}

The primary advantage is the flatness makes our exit handling very obvious. Similarly in readSectors it flattens the entry and exit of the read mode.

Those building React/Redux apps probably want to get those observations into their state. This is relatively easily achieved in redux-saga through the eventChannel API.

function asyncToChannel(generator) {
  return eventChannel(emit => {

    // Set up a promise that iterates the async iterator and emits
    // events on the channel from it.
    (async () => {
      for await (const elem of generator) {
        emit(elem);
      }

      emit(STOP_ITERATION);
    })();

    return () => {
      generator.return();
    };
  });
}

// Saga triggered on DOWNLOAD_BEGIN
function* downloadSaga(action) {
  const writable = ...
  const channel = asyncToChannel(action.data.download(writable));

  // Consume the channel into Redux actions
  while (true) {
    const progress = yield take(channel);

    if (progress === STOP_ITERATION) break;

    yield put(downloadProgress(action.data, progress));
  }

  console.debug("Download complete");
  yield put(downloadComplete(action.data));
}

Tricky to work out, but much more easily read than callback hell.

Using the Nitrokey HSM with GPG in macOS

Getting yourself set up in macOS to sign keys using a Nitrokey HSM with gpg is non-trivial. Allegedly (at least some) Nitrokeys are supported by scdaemon (GnuPG’s stand-in abstraction for cryptographic tokens) but it seems that the version of scdaemon in brew doesn’t have support.

However there is gnupg-pkcs11-scd which is a replacement for scdaemon which uses PKCS #11. Unfortunately it’s a bit of a hassle to set up.

There’s a bunch of things you’ll want to install from brew: opensc, gnupg, gnupg-pkcs11-scd, pinentry-mac, openssl and engine_pkcs11.

brew install opensc gnupg gnupg-pkcs11-scd pinentry-mac \
    openssl engine-pkcs11

gnupg-pkcs11-scd won’t create keys, so if you’ve not made one already, you need to generate yourself a keypair. Which you can do with pkcs11-tool:

pkcs11-tool --module /usr/local/lib/opensc-pkcs11.so -l \
    --keypairgen --key-type rsa:2048 \
    --id 10 --label 'Danielle Madeley'

The --id can be any hexadecimal id you want. It’s up to you to avoid collisions.

Then you’ll need to generate and sign a self-signed X.509 certificate for this keypair (you’ll need both the PEM form and the DER form):

/usr/local/opt/openssl/bin/openssl << EOF
engine -t dynamic \
    -pre SO_PATH:/usr/local/lib/engines/engine_pkcs11.so \
    -pre ID:pkcs11 \
    -pre LIST_ADD:1 \
    -pre LOAD \
    -pre MODULE_PATH:/usr/local/lib/opensc-pkcs11.so
req -engine pkcs11 -new -key 0:10 -keyform engine \
    -out cert.pem -text -x509 -days 3640 -subj '/CN=Danielle Madeley/'
x509 -in cert.pem -out cert.der -outform der
EOF

The flag -key 0:10 identifies the token and key id (see above when you created the key) you’re using. If you want to refer to a different token or key id, you can change these.

And import it back into your HSM:

pkcs11-tool --module /usr/local/lib/opensc-pkcs11.so -l \
    --write-object cert.der --type cert \
    --id 10 --label 'Danielle Madeley'

You can then configure gnupg-agent to use gnupg-pkcs11-scd. Edit the file ~/.gnupg/gpg-agent.conf:

scdaemon-program /usr/local/bin/gnupg-pkcs11-scd
pinentry-program /usr/local/bin/pinentry-mac

And the file ~./gnupg/gnupg-pkcs11-scd.conf:

providers nitrokey
provider-nitrokey-library /usr/local/lib/opensc-pkcs11.so

gnupg-pkcs11-scd is pretty nifty in that it will throw up a (pin entry) dialog if your token is not available, and is capable of supporting multiple tokens and providers.

Reload gpg-agent:

gpg-agent --server gpg-connect-agent << EOF
RELOADAGENT
EOF

Check your new agent is working:

gpg --card-status

Get your key handle (grip), which is the 40-character hex string after the phrase KEY-FRIEDNLY (sic):

gpg-agent --server gpg-connect-agent << EOF
SCD LEARN
EOF

Import this key into gpg as an ‘Existing key’, giving the key grip above:

gpg --expert --full-generate-key

You can now use this key as normal, create sub-keys, etc:

gpg -K
/Users/danni/.gnupg/pubring.kbx
-------------------------------
sec> rsa2048 2017-07-07 [SCE]
 1172FC7B4B5755750C65F9A544B80C280F80807C
 Card serial no. = 4B43 53233131
uid [ultimate] Danielle Madeley <danielle@madeley.id.au>

echo -n "Hello World" | gpg --armor --clearsign --textmode

Side note: the curses-based pinentry doesn’t deal with piping content into stdin, which is why you want pinentry-mac.

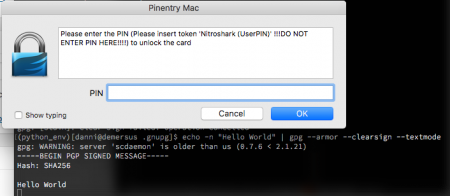
Terminal console showing a gpg signing command. Over the top is a dialog box prompting the user to insert her Nitrokey token

You can also import your certificate into gpgsm:

gpgsm --import < ca-certificate
gpgsm --learn-card

And that’s it, now you can sign your git tags with your super-secret private key, or whatever it is you do. Remember that you can’t exfiltrate the secret keys from your HSM in the clear, so if you need a backup you can create a DKEK backup (see the SmartcardHSM docs), or make sure you’ve generated that revocation certificate, or just decided disaster recovery is for dweebs.

python-pkcs11 with the Nitrokey HSM

So my Nitrokey HSM arrived and it works great, thanks to the Nitrokey peeps for sending me one.

Because the OpenSC PKCS #11 module is a little more lightweight than some of the other vendors, which often implement mechanisms that are not actually supported by the hardware (e.g. the Opencryptoki TPM module), I wrote up some documentation on how to use the device, focusing on how to extract the public keys for using outside of PKCS #11, as the Nitrokey doesn’t implement any of the public key functions.

Nitrokey with python-pkcs11

This also encouraged me to add a whole bunch more of the import/extraction functions for the diverse key formats, including getting very frustrated at the lack of documentation for little things like how OpenSSL stores EC public keys (the answer is as SubjectPublicKeyInfo from X.509), although I think there might be some operating system specific glitches with encoding some DER structures. I think I need to move from pyasn1 to asn1crypto.

Applied PKCS#11

The most involved thing I’ve had to learn this year is how to actually use PKCS #11 to talk to crypto hardware. It’s actually not that clear. Most of the examples are buried in random bits of C from vendors like Oracle or IBM; and the spec itself is pretty dense. Especially when it comes to understanding how you actually use it, and what all the bits and pieces do.

In honour of our Prime Minister saying he should have NOBUS access into our cryptography, which is why we should all start using hardware encryption modules (did you know you can use your TPM) and thus in order to save the next girl 6 months of poking around on a piece of hardware she doesn’t really *get*, I started a document: Applied PKCS#11.

The later sections refer to the API exposed by python-pkcs11, but the first part is generally relevant. Hopefully it makes sense, I’m super keen to get feedback if I’ve made any huge logical leaps etc.

Update on python-pkcs11

I spent a bit of time fleshing out the support matrix for python-pkcs11 and getting things that aren’t SoftHSM into CI for integration testing (there’s still no one-command rollout for BuildBot connected to GitHub, but I got there in the end).

The nice folks at Nitrokey are also sending me some devices to widen the compatibility matrix. Also happy to make it work with CloudHSM if someone at Amazon wants to hook me up!

I also put together API docs that hopefully help to explain how to actually use the thing and added support for RFC3279 to pyasn1_modules (so you can encode your elliptic curve parameters).

Next goal is to open up my Django HSM integrations to add encrypted database fields, encrypted file storage and various other offloads onto the HSM. Also look at supporting certificate objects for all that wonderful stuff.

Announcing new high-level PKCS#11 HSM support for Python

Recently I’ve been working on a project that makes use of Thales HSM devices to encrypt/decrypt data. There’s a number of ways to talk to the HSM, but the most straight-forward from Linux is via PKCS#11. There were a number of attempts to wrap the PKCS#11 spec for Python, based on SWIG, cffi, etc., but they were all (a) low level, (b) not very Pythonic, (c) have terrible error handling, (d) broken, (e) inefficient for large files and (f) very difficult to fix.

Anyway, given that nearly all documentation on how to actually use PKCS#11 has to be discerned from C examples and thus I’d developed a pretty good working knowledge of the C API, and I’ve wanted to learn Cython for a while, I decided I’d write a new binding based on a high level wrapper I’d put into my app. It’s designed to be accessible, pick sane defaults for you, use generators where appropriate to reduce work, stream large files, be introspectable in your programming environment and be easy to read and extend.

https://github.com/danni/python-pkcs11

It’s currently a work in progress, but it’s now available on pip. You can get a session on a device, create a symmetric key, find objects, encrypt and decrypt data. The Cryptoki spec is quite large, so I’m focusing on the support that I need first, but it should be pretty straightforward for anyone who wanted to add something else they needed. I like to think I write reasonably clear, self-documenting code.

At the moment it’s only tested on SoftHSMv2 and the Thales nCipher Edge, which is what I have access to. If someone at Amazon wanted this to work flawlessly on CloudHSM, send me an account and I’ll do it 😛 Then I can look at releasing my Django integrations for fields, storage, signing, etc.

PostgreSQL date ranges in Django forms

Django’s postgres extensions support data types like DateRange which is super useful when you want to query your database against dates, however they have no form field to expose this into HTML.

Handily Django 1.11 has made it super easy to write custom widgets with complex HTML.

Continue reading “PostgreSQL date ranges in Django forms”

Websockets + socket.io on the ESP8266 w/ Micropython

I recently learned about the ESP8266 while at Pycon AU. It’s pretty nifty: it’s tiny, it has wifi, a reasonable amount of RAM (for a microcontroller) oh, and it can run Python. Specifically Micropython. Anyway I purchased a couple from Adafruit (specifically this one) and installed the Micropython UNIX port on my computer (be aware with the cheaper ESP8266 boards, they might not be very reflashable, or so I’ve been told, spend the extra money for one with decent flash).

The first thing you learn is that the ports are all surprisingly different in terms of what functionality they support, and the docs don’t make it clear like they do for CPython. I learned the hard way there is a set of docs per port, which maybe is why you the method you’re looking for isn’t there.

The other thing is that even though you’re getting to write in Python, and it has many Pythonic abstractions, many of those abstractions are based around POSIX and leak heavily on microcontrollers. Still a number of them look implementable without actually reinventing UNIX (probably).

The biggest problem at the moment is there’s no “platform independent” way to do asynchronous IO. On the microcontroller you can set top-half interrupt handlers for IO events (no malloc here, yay!), gate the CPU, and then execute bottom halfs from the main loop. However that’s not going to work on UNIX. Or you can use select, but that’s not available on the ESP8266 (yet). Micropython does support Python 3.5 asyncio coroutines, so hopefully the port of asyncio to the ESP8266 happens soon. I’d be so especially ecstatic if I could do await pin.trigger(Pin.FALLING).

There’s a few other things that could really help make it feel like Python. Why isn’t disabling interrupts a context manager/decorator. It’s great that you can try/finally your interrupt code, but the with keyword is so much more Pythonic. Perhaps this is because the code is being written by microprocessor people… which is why they’re so into protocols like MQTT for talking to their devices.

Don’t get me wrong, MQTT is a great protocol that you can cram onto all sorts of devices, with all sorts of crappy PHYs, but I have wifi, and working SSL. I want to do something more web 2.0. Something like websockets. In fact, I want to take another service’s REST API and websockets, and deliver that information to my device… I could build a HTTP server + MQTT broker, but that sounds like a pain. Maybe I can just build a web server with socket.io and connect to that directly from the device?!

The ESP8266 already has some very basic websocket support for its WebREPL, but that’s not very featureful and seems to only implement half of the spec. If we’re going to have Python on a device, maybe we can have something that looks like the great websockets module. Turns out we can!

socket.io is a little harder, it requires a handshake which is not documented (I reversed it in the end), and decoding a HTTP payload, which is not very clearly documented (had to read the source). It’s not the most efficient protocol out there, but the chip is more than fast enough to deal with it. Also fun times, it turns out there’s no platform independent way to return from waiting for IO. Basically it turned out there were a lot of yaks to shave.

Where it all comes into its own though is the ability to write what is pretty much everyday, beautiful Python however, it’s worth it over Arduino sketches or whatever else takes your fancy.

uwebsockets/usocketio on Github.

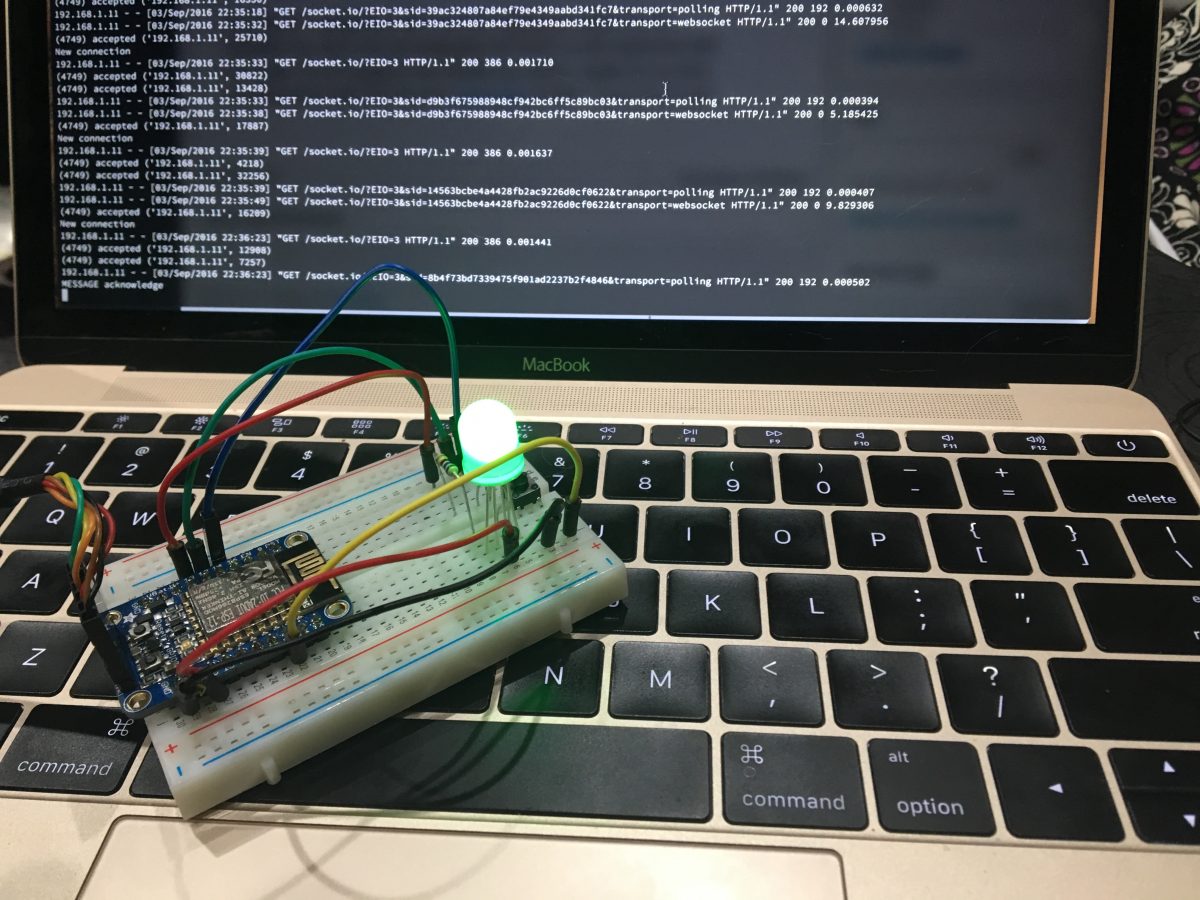
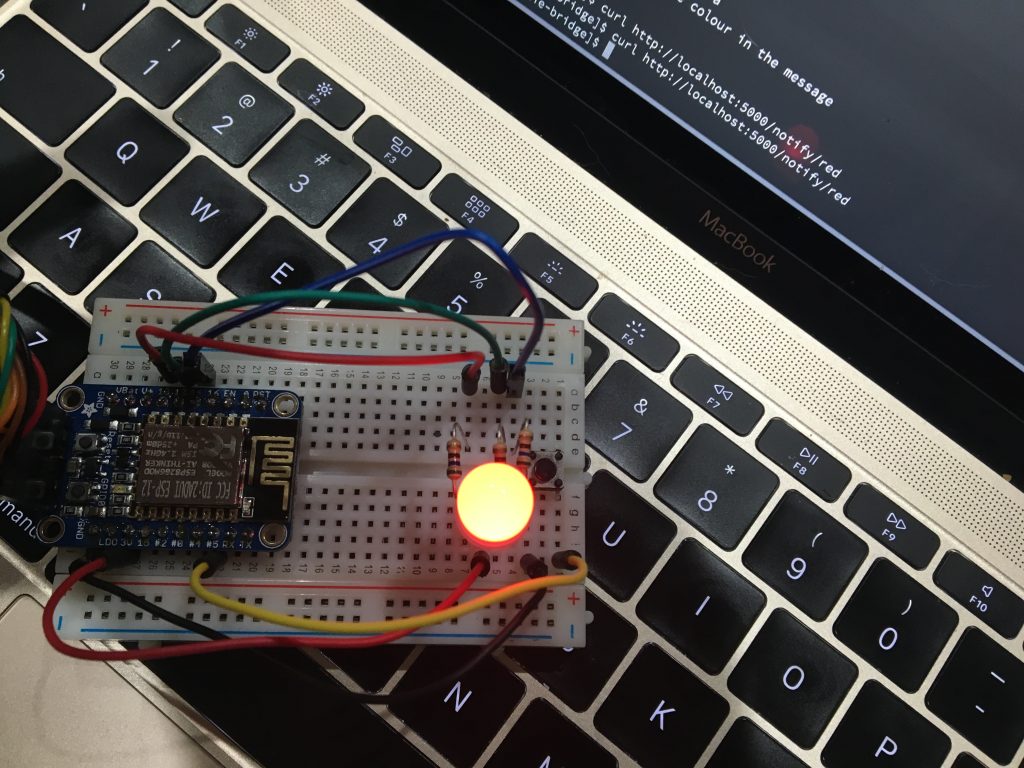
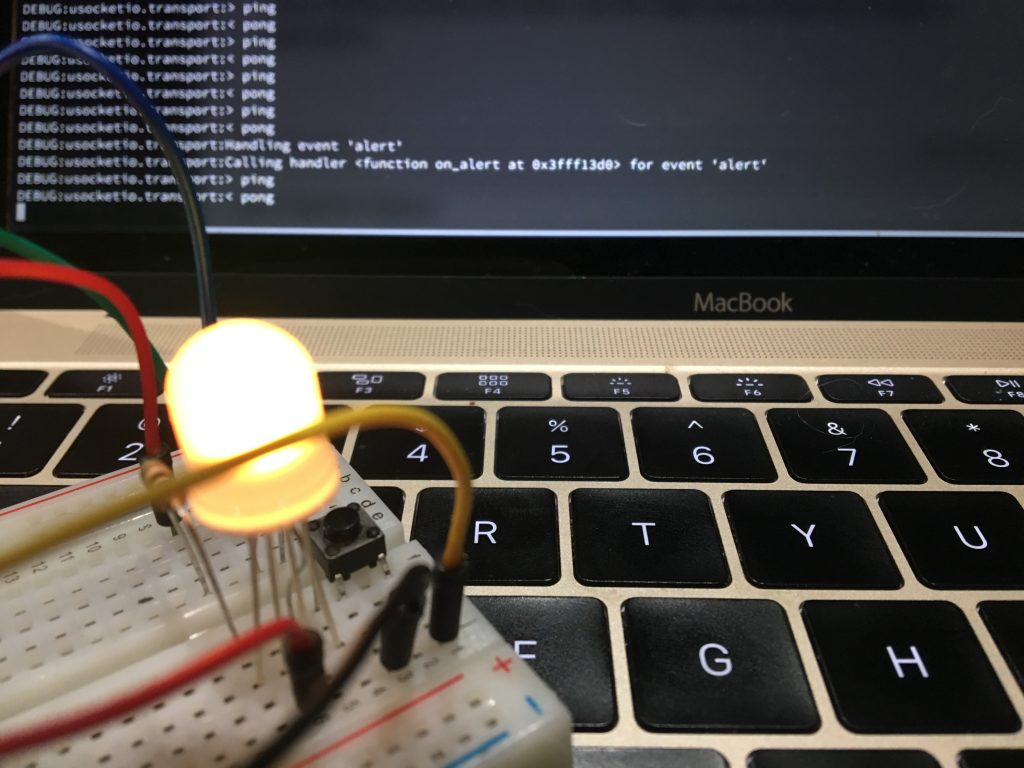
Electronics breadboard with a project on it sitting on a laptop keyboard Electronics breadboard with a project on it sitting on a laptop keyboard

Django and PostgreSQL composite types

PostgreSQL has this nifty feature called composite types that you can use to create your own types from the built-in PostgreSQL types. It’s a bit like hstore, only structured, which makes it great for structured data that you might reuse multiple times in a model, like addresses.

Unfortunately to date, they were pretty much a pain to use in Django. There were some older implementations for versions of Django before 1.7, but they tended to do things like create surprise new objects in the namespace, not be migrateable, and require connection to the DB at any time (i.e. during your build).

Anyway, after reading a bunch of their implementations and then the Django source code I wrote django-postgres-composite-types.

Install with:

pip install django-postgres-composite-types

Then you can define a composite type declaratively:

from django.db import models
from postgres_composite_type import CompositeType


class Address(CompositeType):
    """An address."""

    address_1 = models.CharField(max_length=255)
    address_2 = models.CharField(max_length=255)

    suburb = models.CharField(max_length=50)
    state = models.CharField(max_length=50)

    postcode = models.CharField(max_length=10)
    country = models.CharField(max_length=50)

    class Meta:
        db_type = 'x_address'  # Required

And use it in a model:

class Person(models.Model):
    """A person."""

    address = Address.Field()

The field should provide all of the things you need, including formfield etc and you can even inherit this field to extend it in your own way:

class AddressField(Address.Field):
    def __init__(self, in_australia=True, **kwargs):
        self.in_australia = in_australia

        super().__init__(**kwargs)

Finally to set up the DB there is a migration operation that will create the type that you can add:

import address
from django.db import migrations


class Migration(migrations.Migration):

    operations = [
        # Registers the type
        address.Address.Operation(),
        migrations.AddField(
            model_name='person',
            name='address',
            field=address.Address.Field(blank=True, null=True),
        ),
    ]

It’s not smart enough to add it itself (can you do that?). Nor would it be smart enough to write the operations to alter a type. That would be a pretty cool trick. But it’s useful functionality all the same, especially when the alternative is creating lots of 1:1 models that are hard to work with and hard to garbage collect.

It’s still pretty early days, so the APIs are subject to change. PRs accepted of course.

Fixing botched migrations with `oc debug`

When using Openshift Origin to deploy software, you often have your containers execute a database migration as part of their deployment, e.g. in your Dockerfile:

CMD ./manage.py migrate --noinput && \
    gunicorn -w 4 -b 0.0.0.0:8000 myapp.wsgi:application

This works great until your migration won’t apply cleanly without intervention, your newly deploying pods are in crashloop backup, and you need to understand why. This is where the `oc debug` command comes in. Using `oc debug` we can ask for a shell on a pod running or newly created.

Assuming we have a deployment config `frontend`:

oc debug dc/frontend

will give us a shell in a running pod for the latest stable deployment (i.e. your currently running instances, not the ones that are crashing).

However let’s say deployment #44 is the one crashing. We can debug a pod from the replication controller for deployment #44.

oc debug rc/frontend-44

will give us a shell in a new pod for that deployment, with our new code, and allows us to manually massage our broken migration in (e.g. by faking the data migration that was retroactively added for production).

Creative Commons Attribution-ShareAlike 2.5 Australia
This work by Danielle Madeley is licensed under a Creative Commons Attribution-ShareAlike 2.5 Australia.