Sometimes I build stuff other than software and this is a post about that.
My wife and I had to postpone our honeymoon for a couple years due to COVID. Last spring we were able to take a trip to Thailand and really enjoyed it. So much so that when we got back we had a desire recreate that sort of relaxed urban yet tropical feel we enjoyed so much in various cities.
We don’t have a lot of extra space at our house but we did have some in the back which was vacated by recently fell Elm which were diseased.
I’m not one to shy away from projects I’ve never done before so why not build a deck and pergola to fill out that space for entertaining and hacking?
The first step was to even the grade. When we bought the house it was already sloped but the grinding of Elm tree trunks added another layer on top of that.
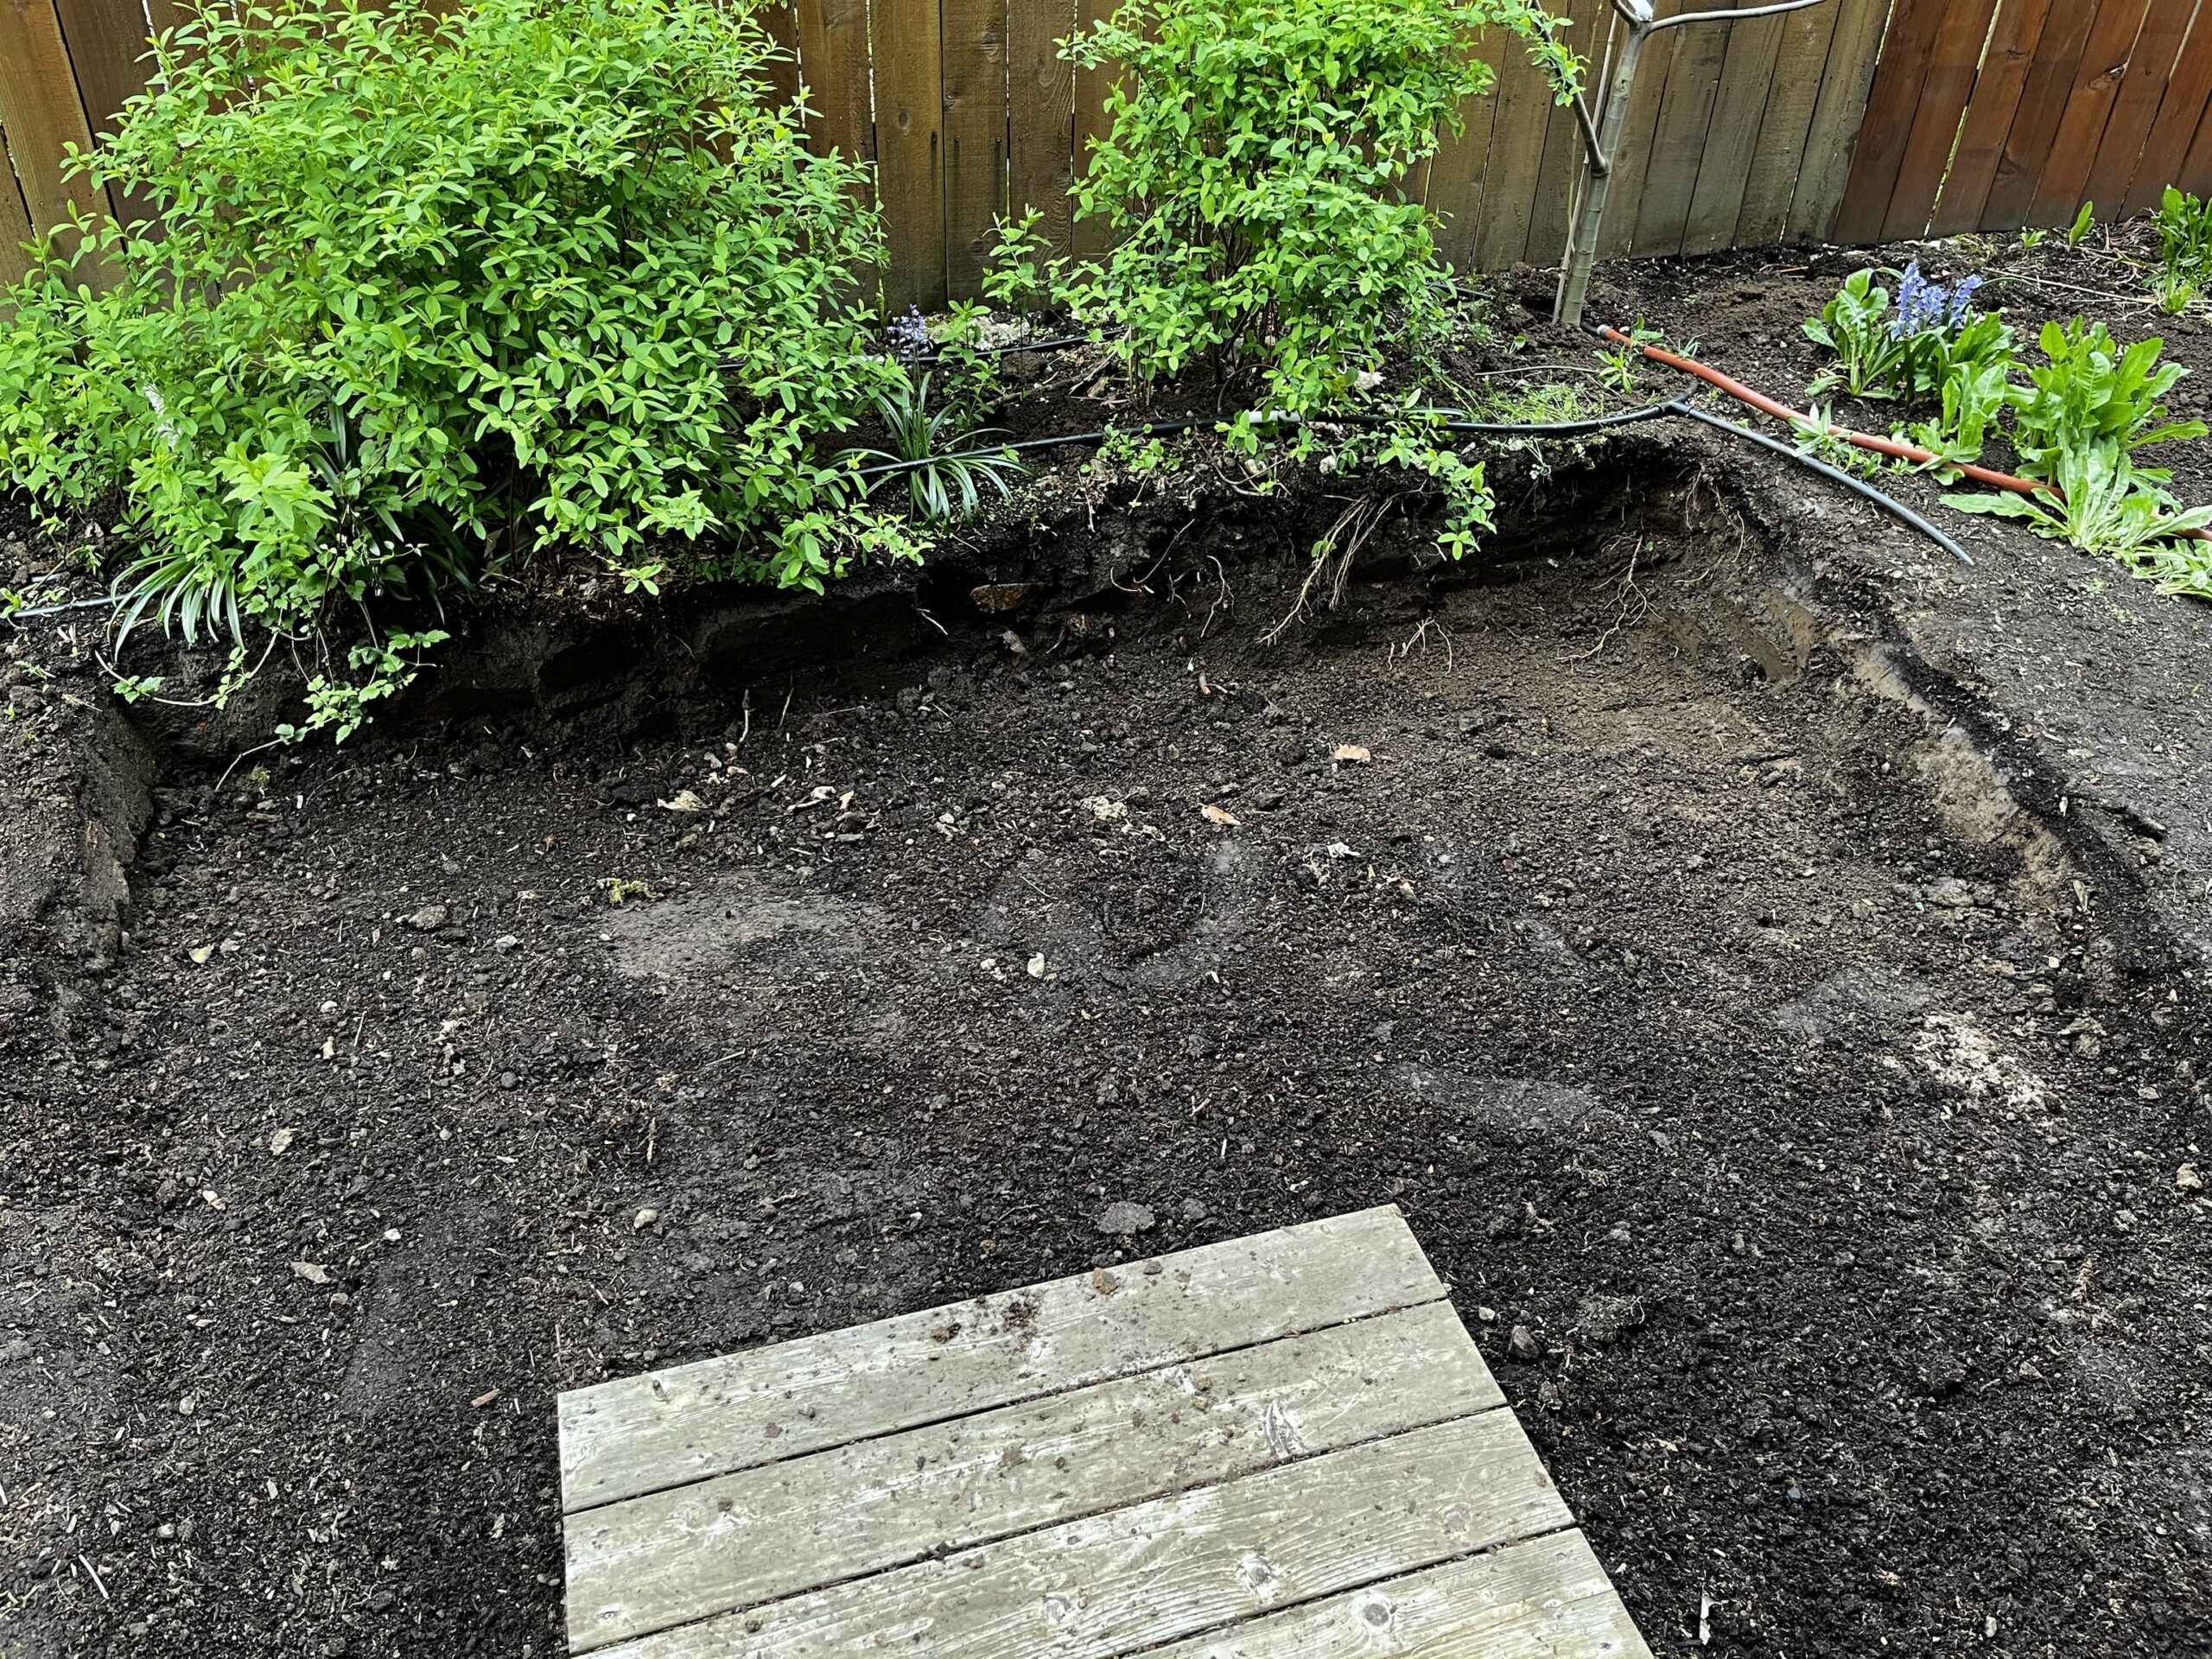
That is a lot of work but to make something 8’×20′ we need to clear a lot more than this. Only to be made worse by root after root of dead Elm tree remnants. Pick axe and sweat.
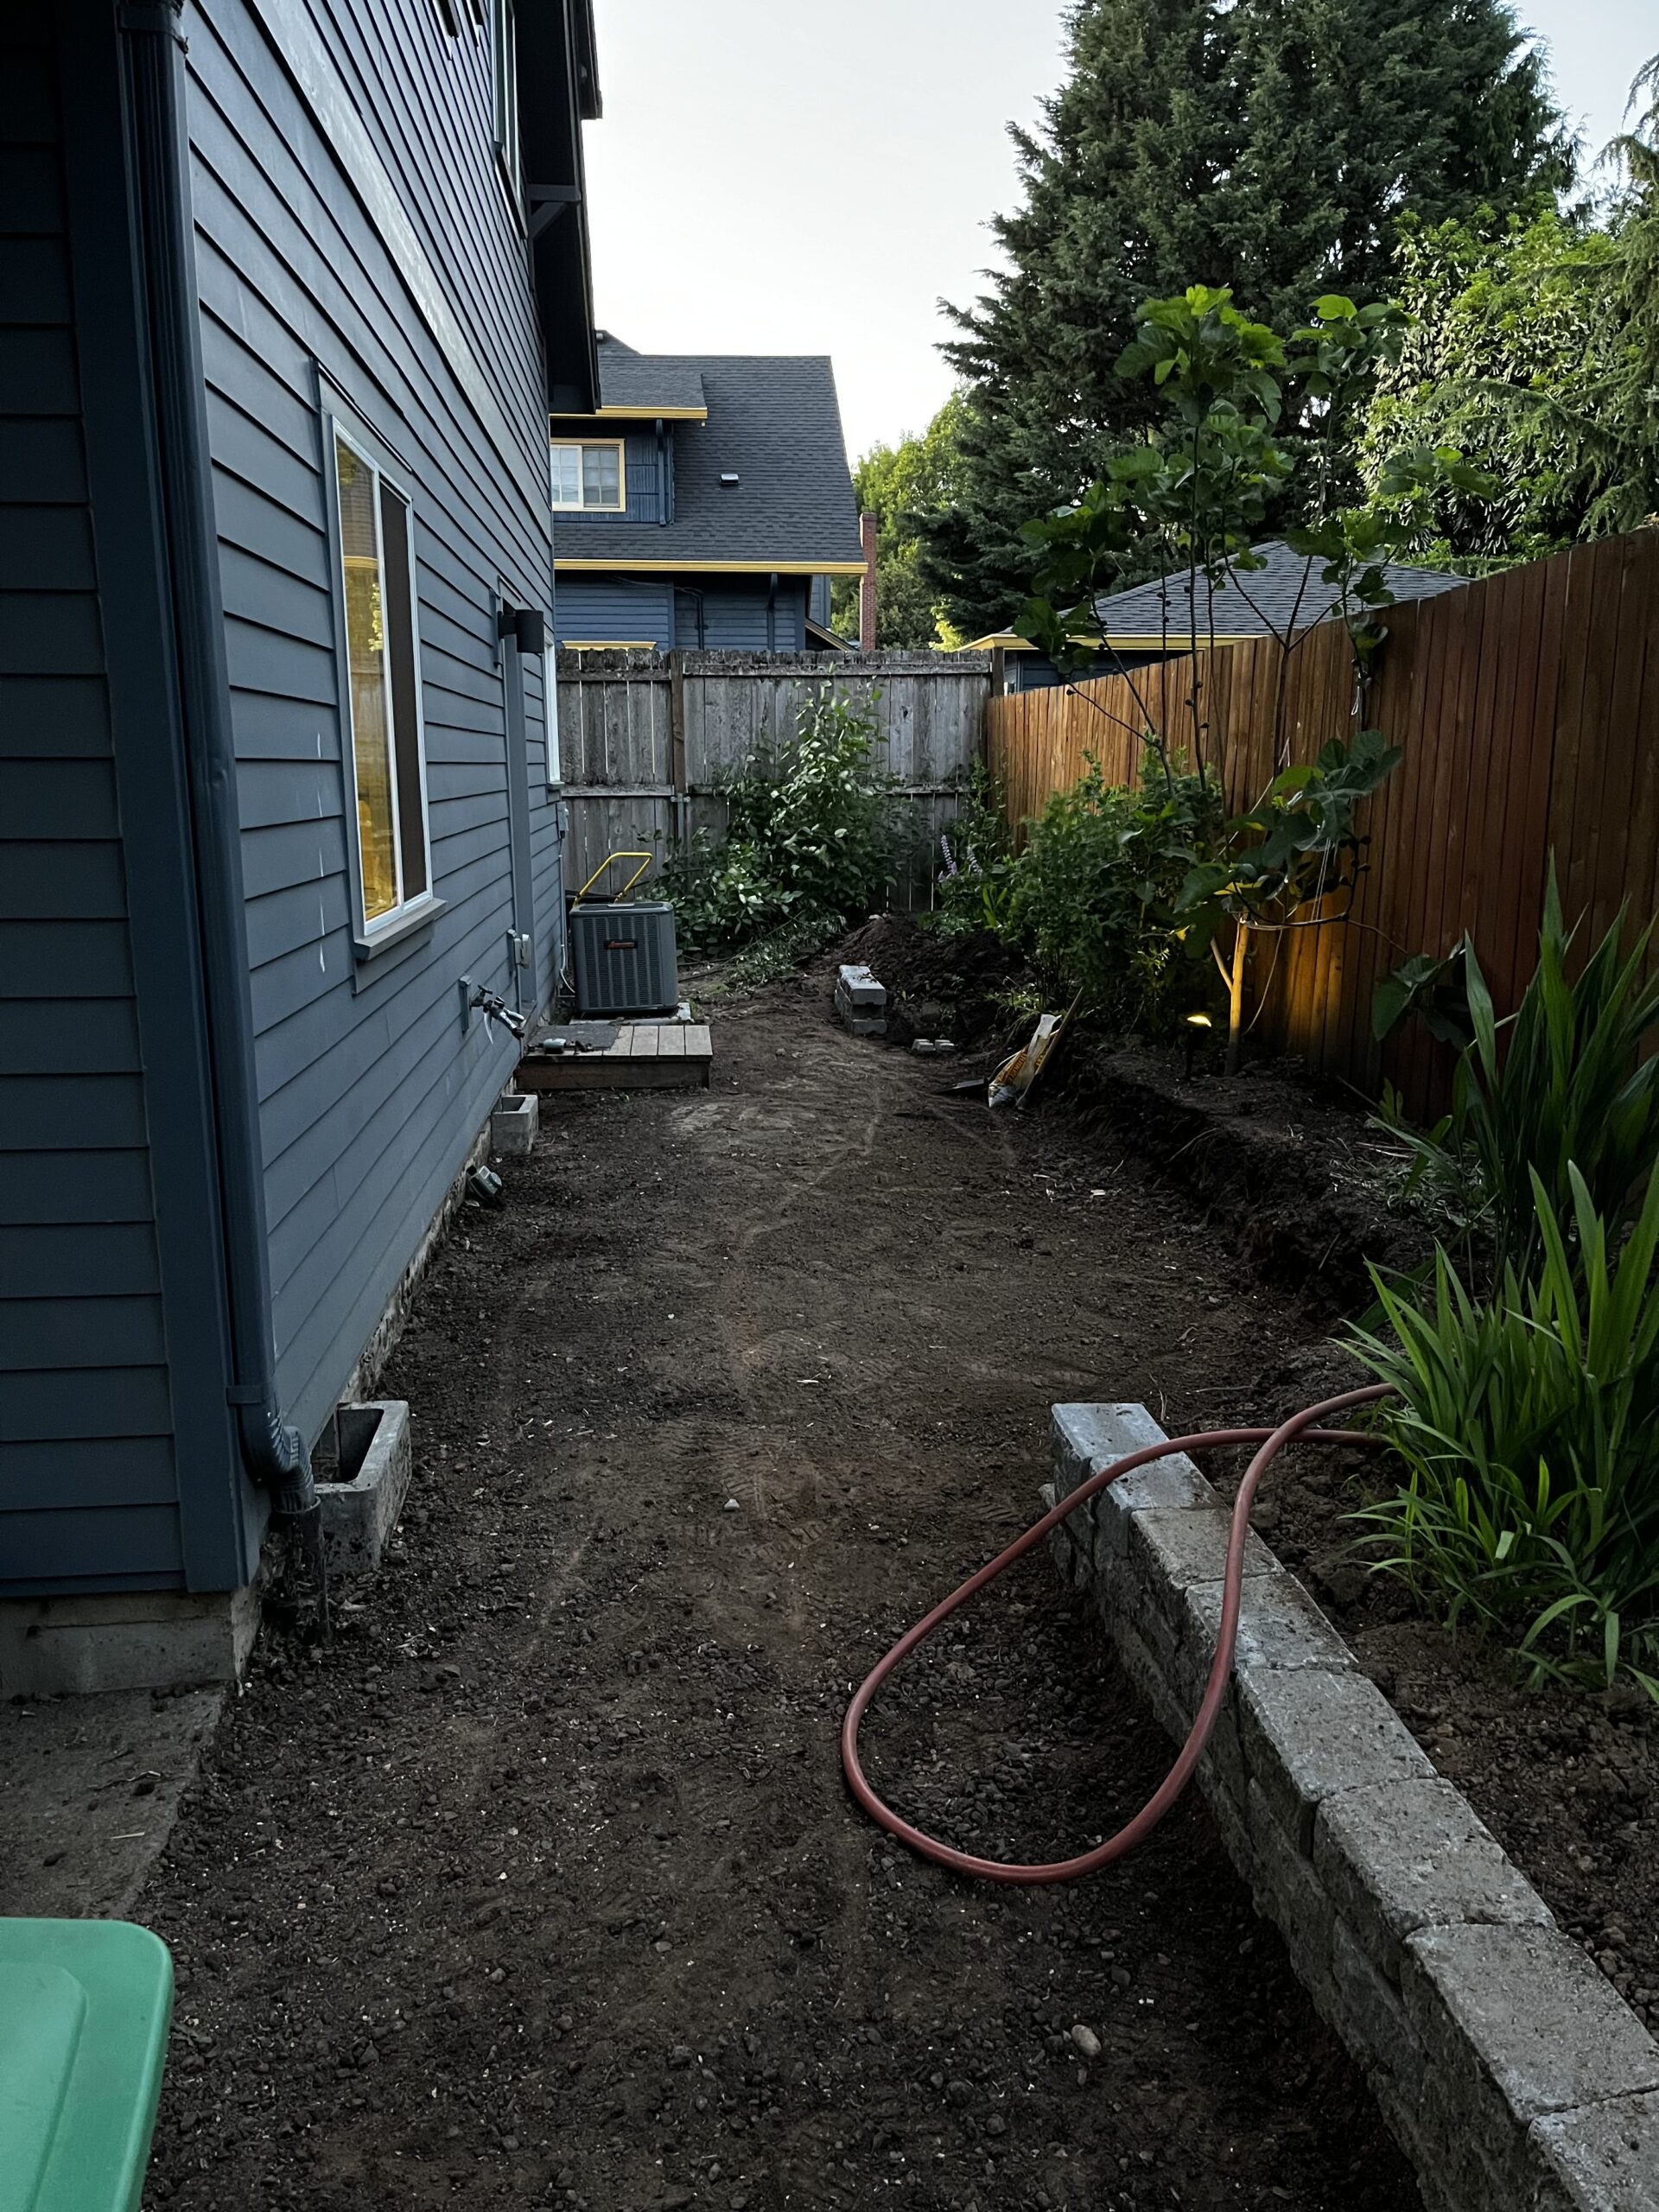
That’s more like it.
We don’t have much of a frost line here so you don’t need to do the whole concrete-pylon thing for the deck and integrated pergola. But what we do need to do is ensure that we have a retaining wall to keep wet ground from touching the cedar for the deck.
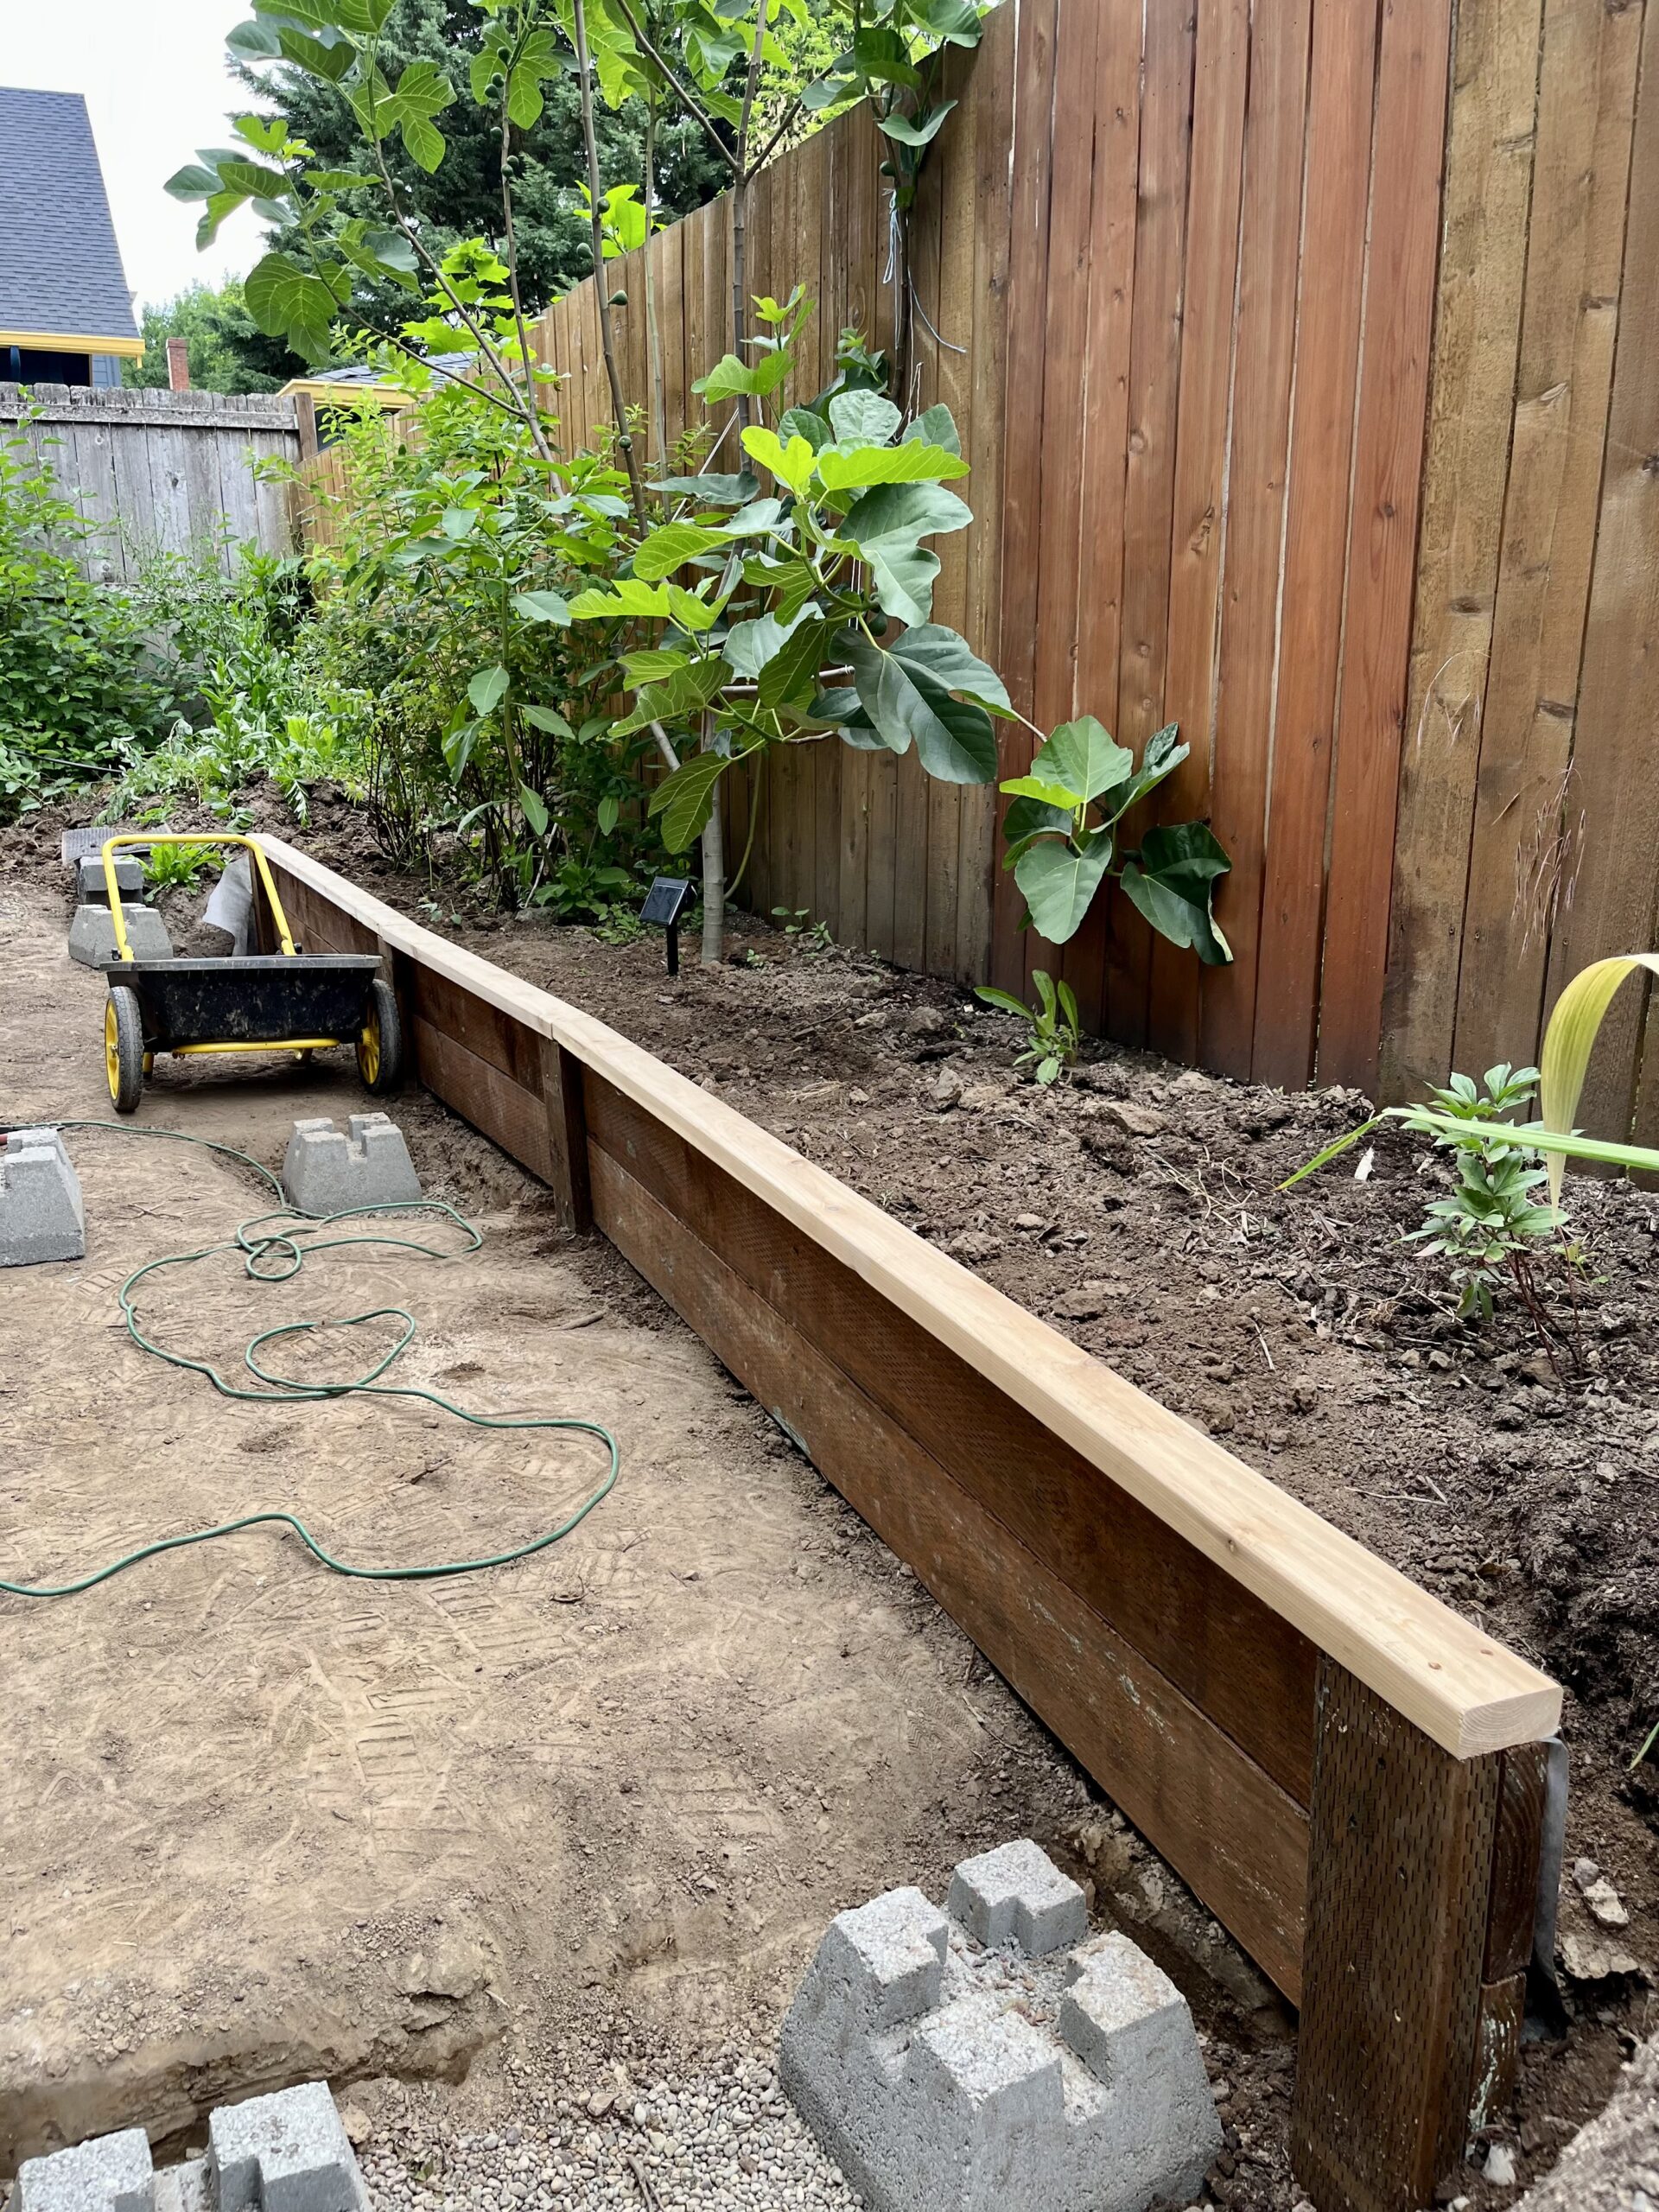
The 2×4 cedar topper is mostly just there to match what will be the cedar floor of the deck.
A bunch of gravel of various grades under the cinders create something stable that drains water beneath the cedar 4×4 which will be our columns.
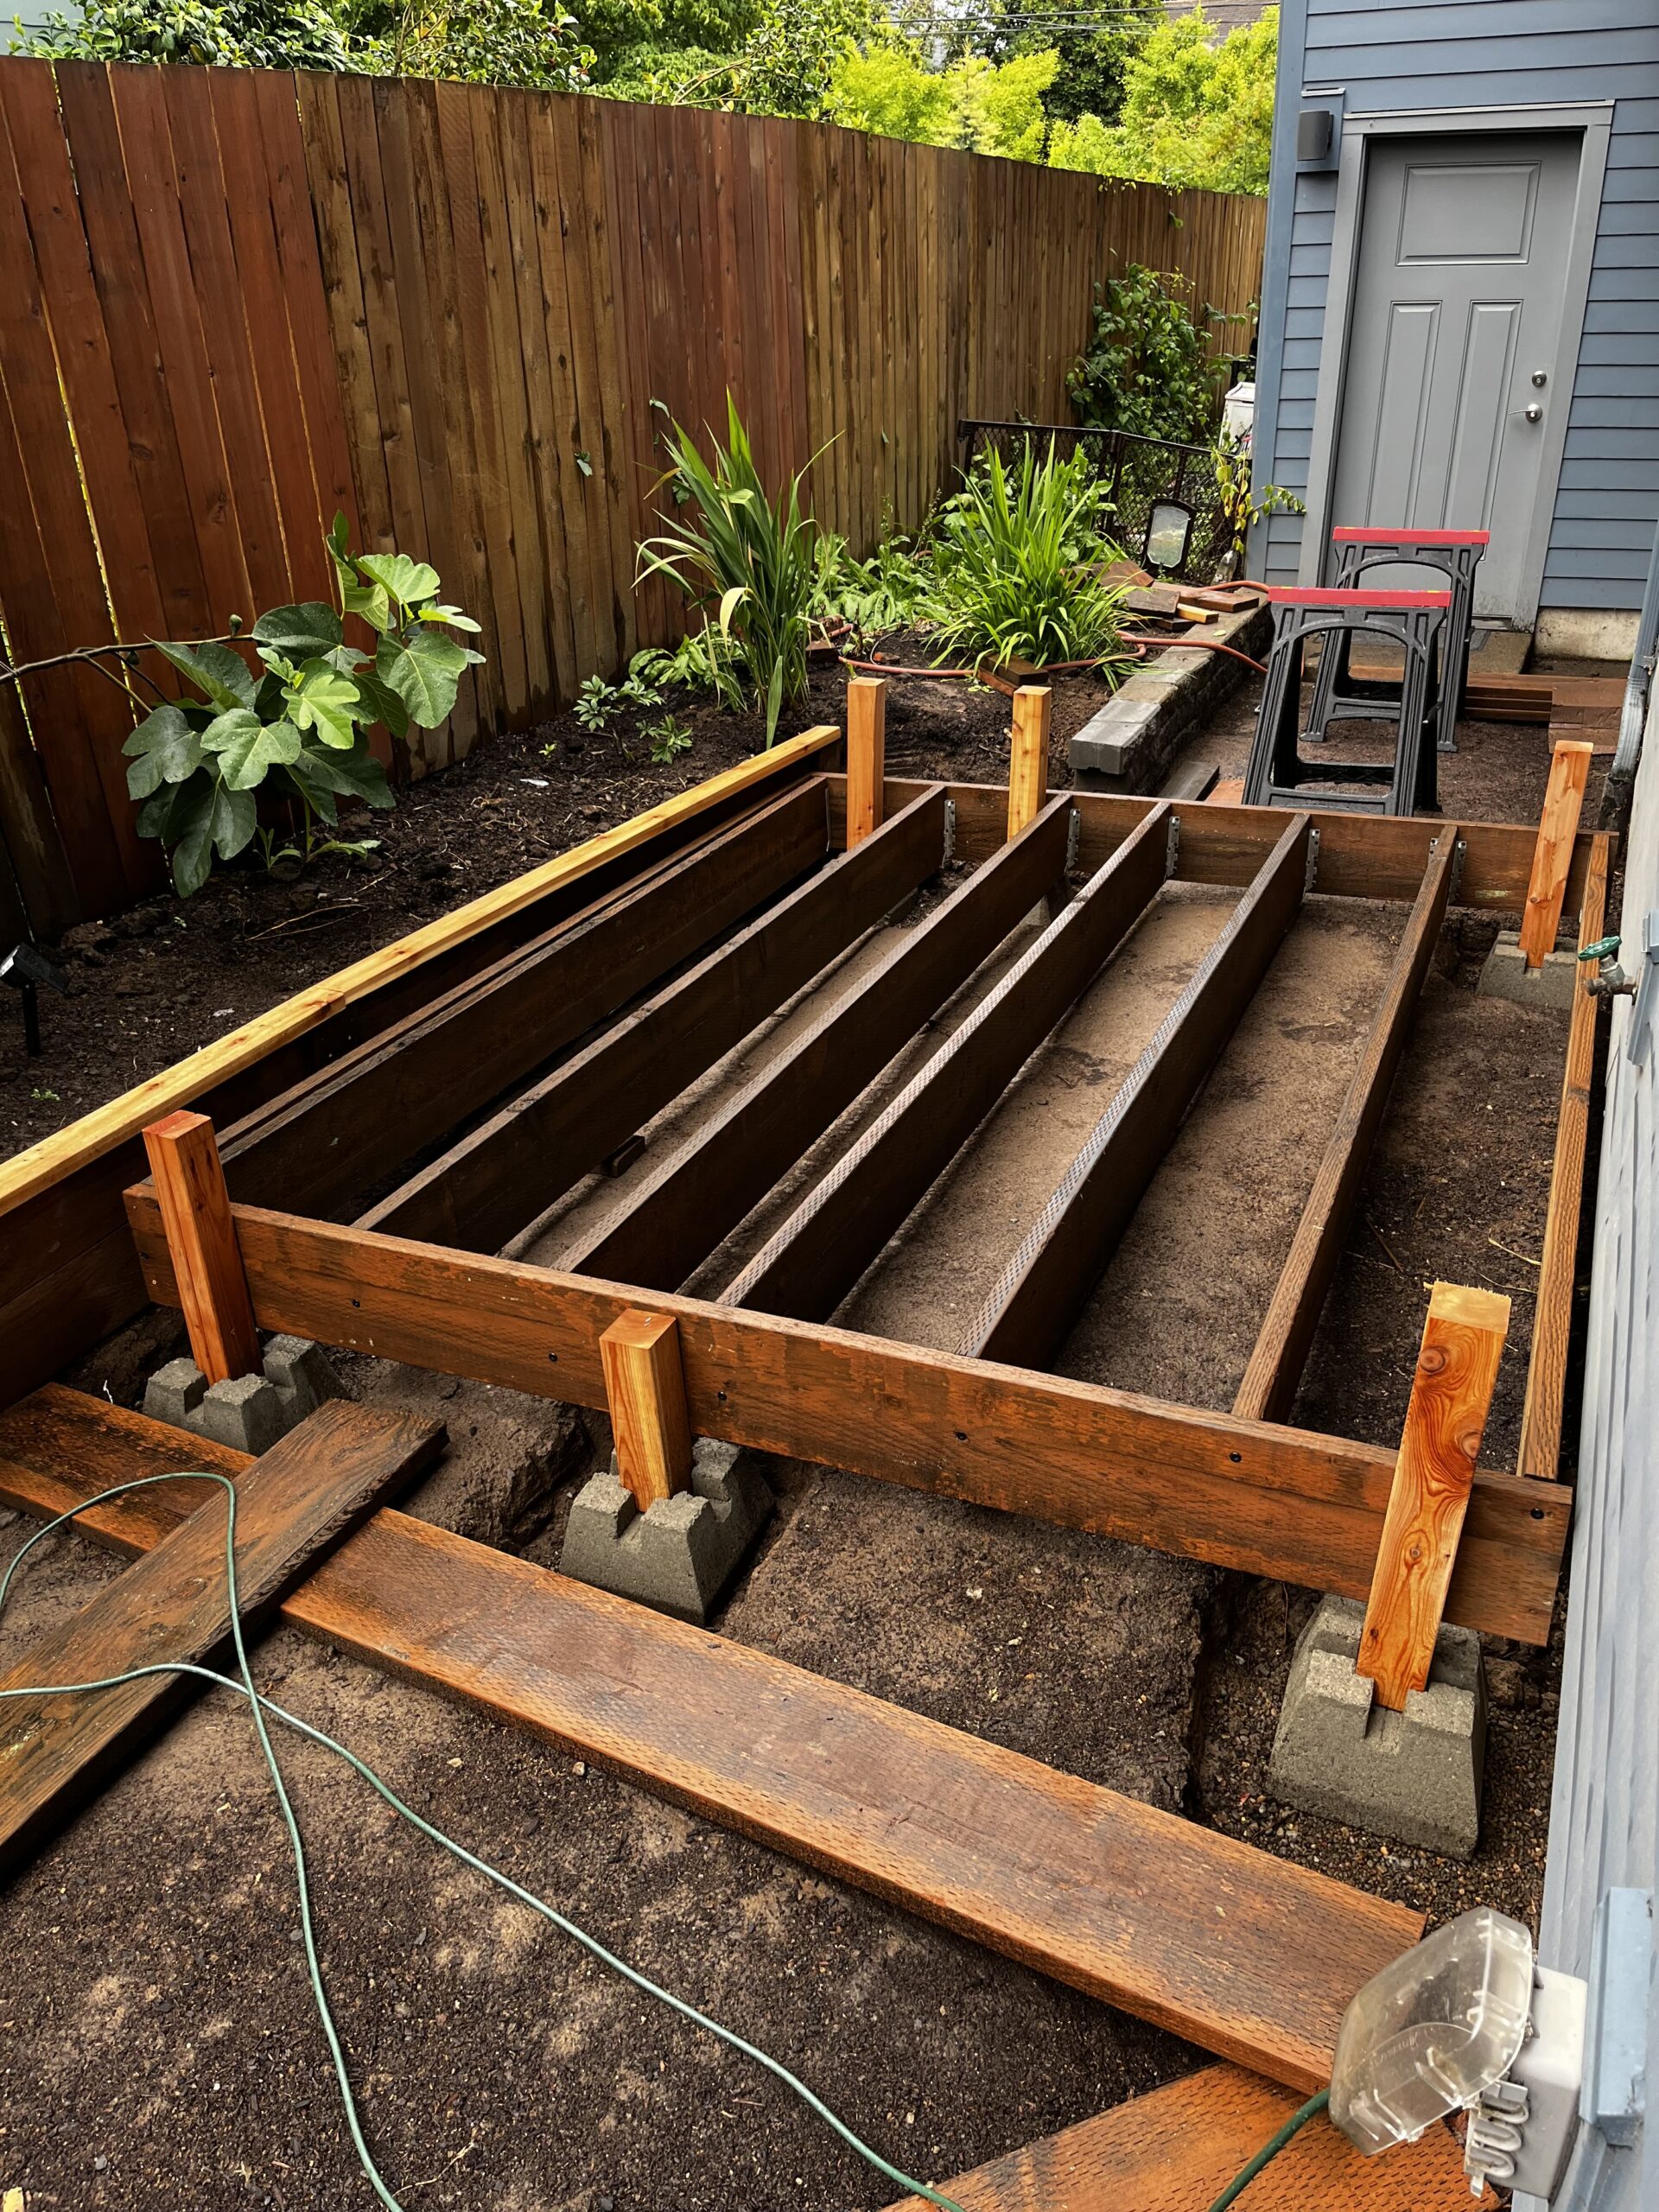
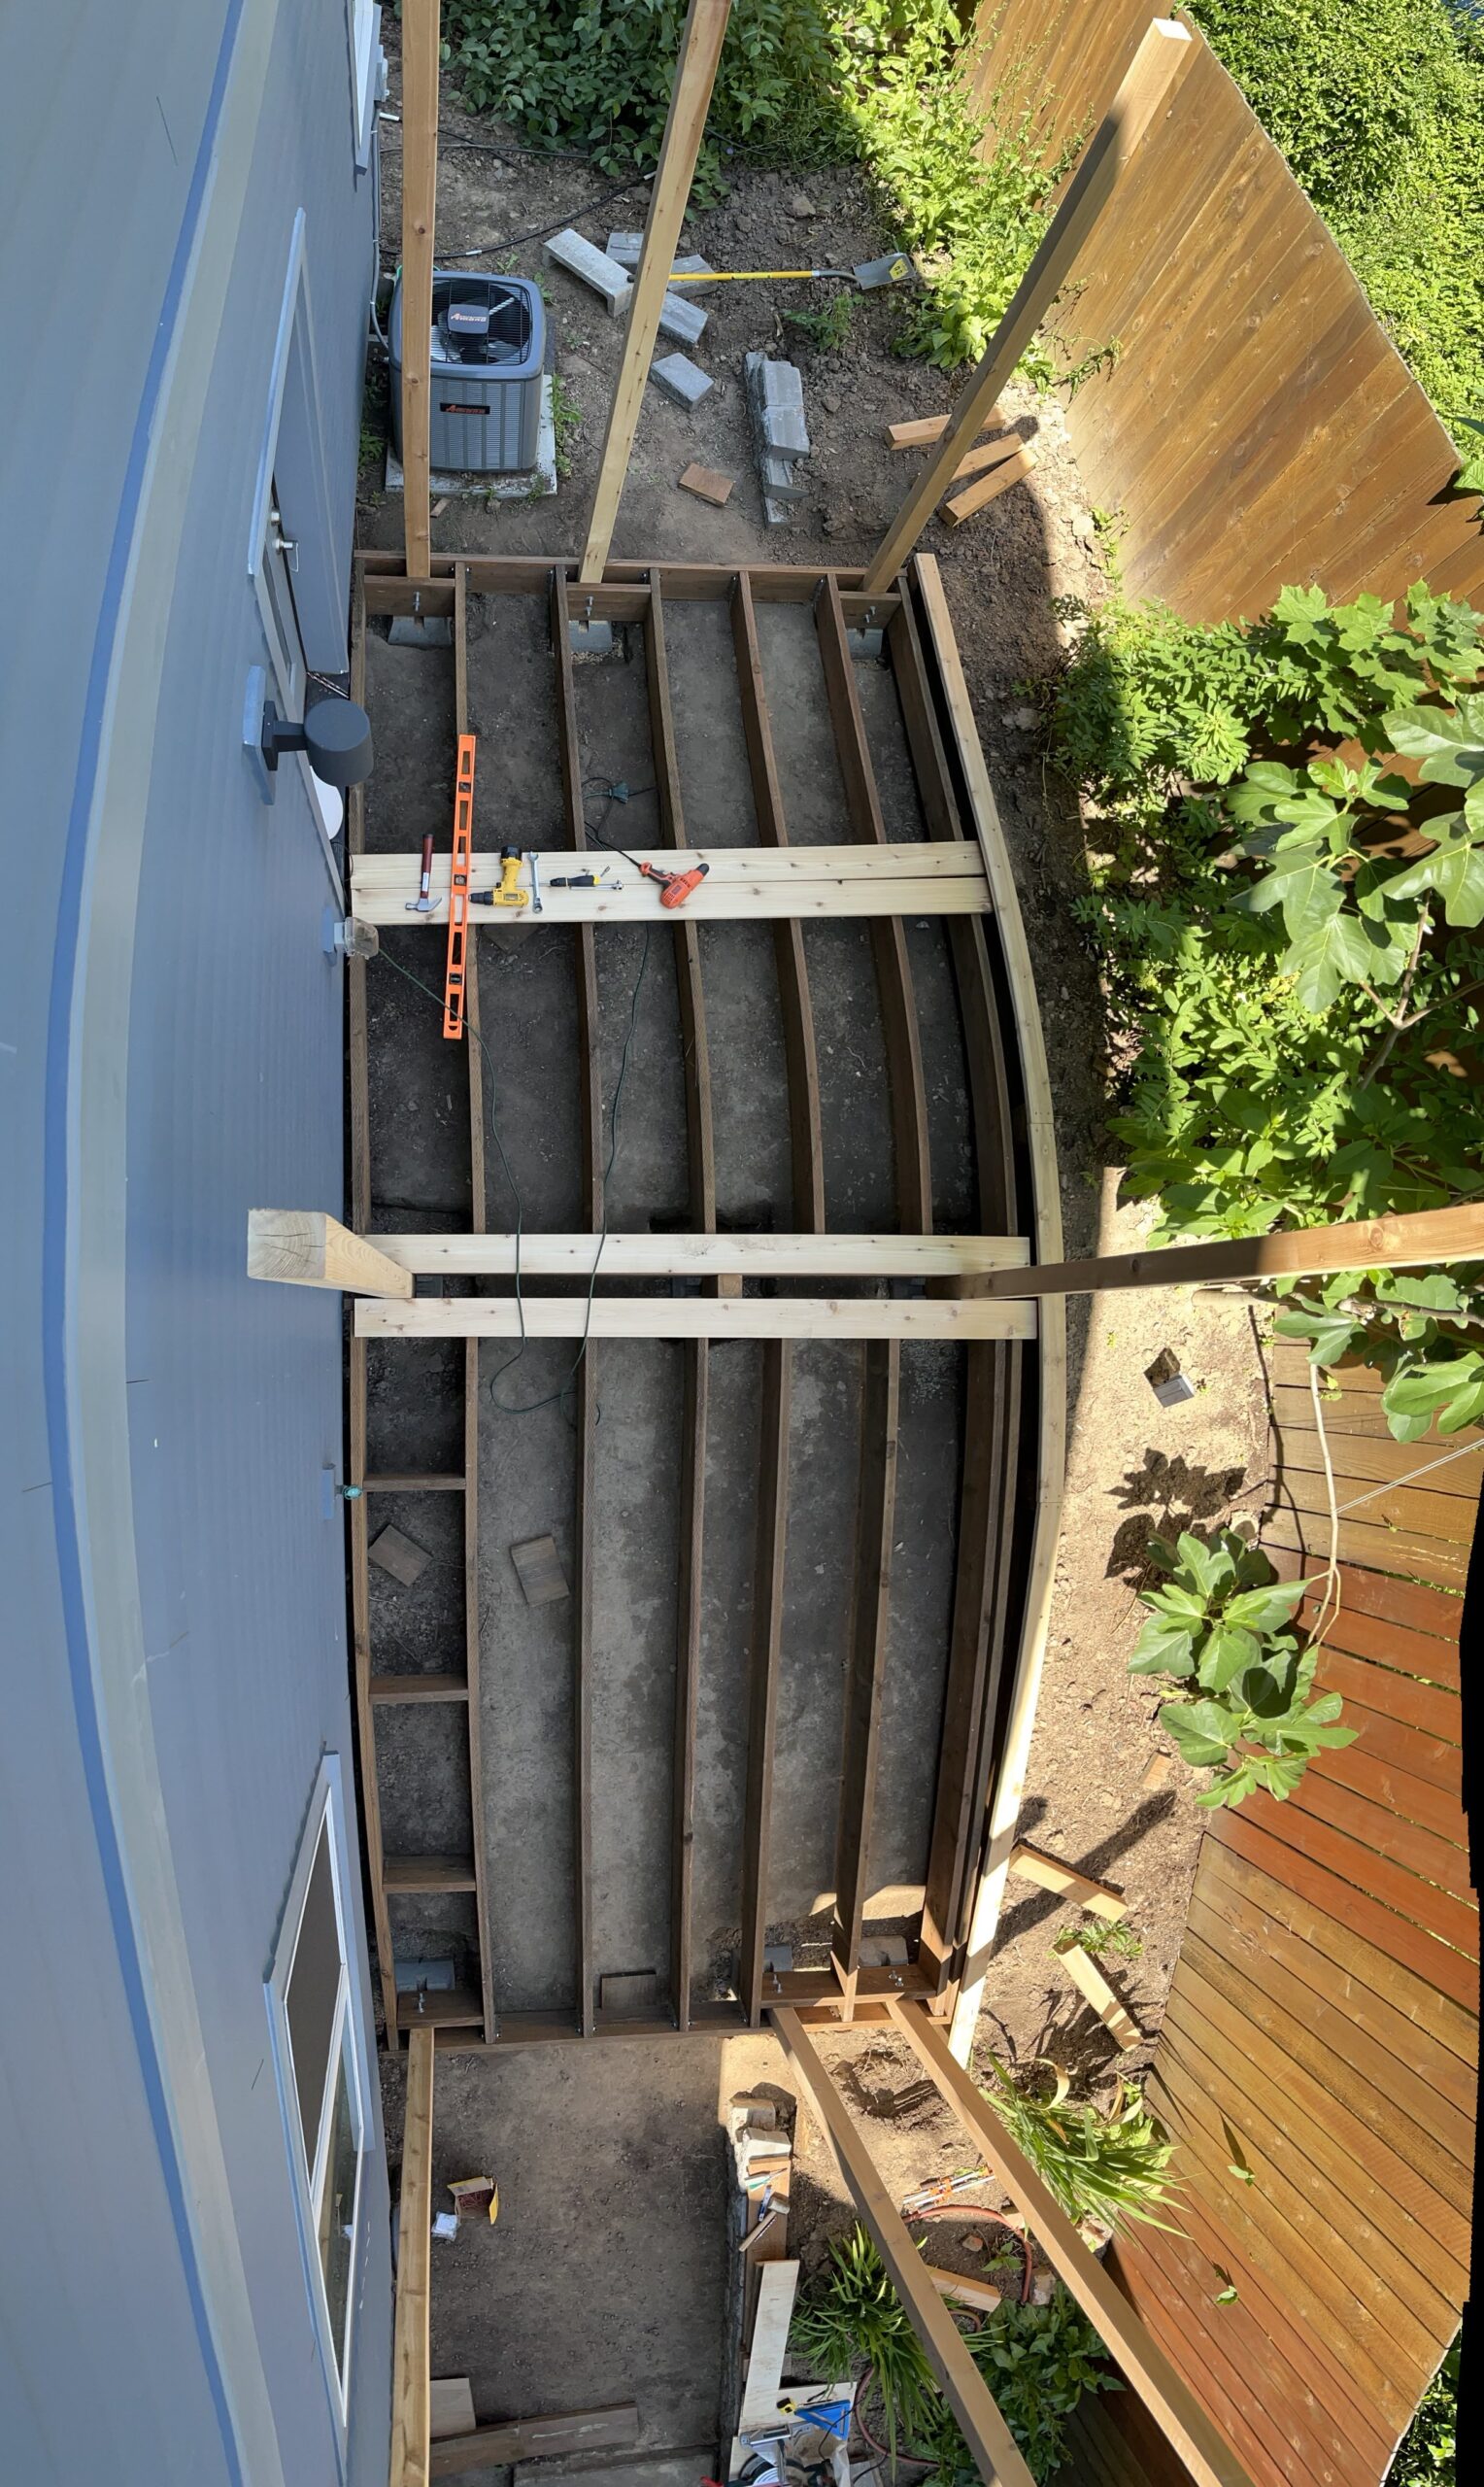
This is built as two 8’×10′ sections which are connected. That makes the math much easier in my head but also easier to source good wood. Above you see the rim and floor joists for the first side with the blocking yet to be done.
I lucked out that the cedar supplier gave me 12′ 4×4s instead of the requested 10′. That gave me 2′ extra to use when framing without having to first get the whole 10′ columns leveled. Later one we’ll take them out one-by-one and replace them with the columns.
Now we have the columns in place and the whole thing leveled. Blocking has started and will get completed before adding the floor boards. I ended up using screws at an angle from the rounded corners of the ceder floor boards using “camo hidden fasteners”. After seeing how they handled the winter that was definitely the right decision.
Thankfully I had help from my wife and emeritus GNOMie Cosimo with all this.
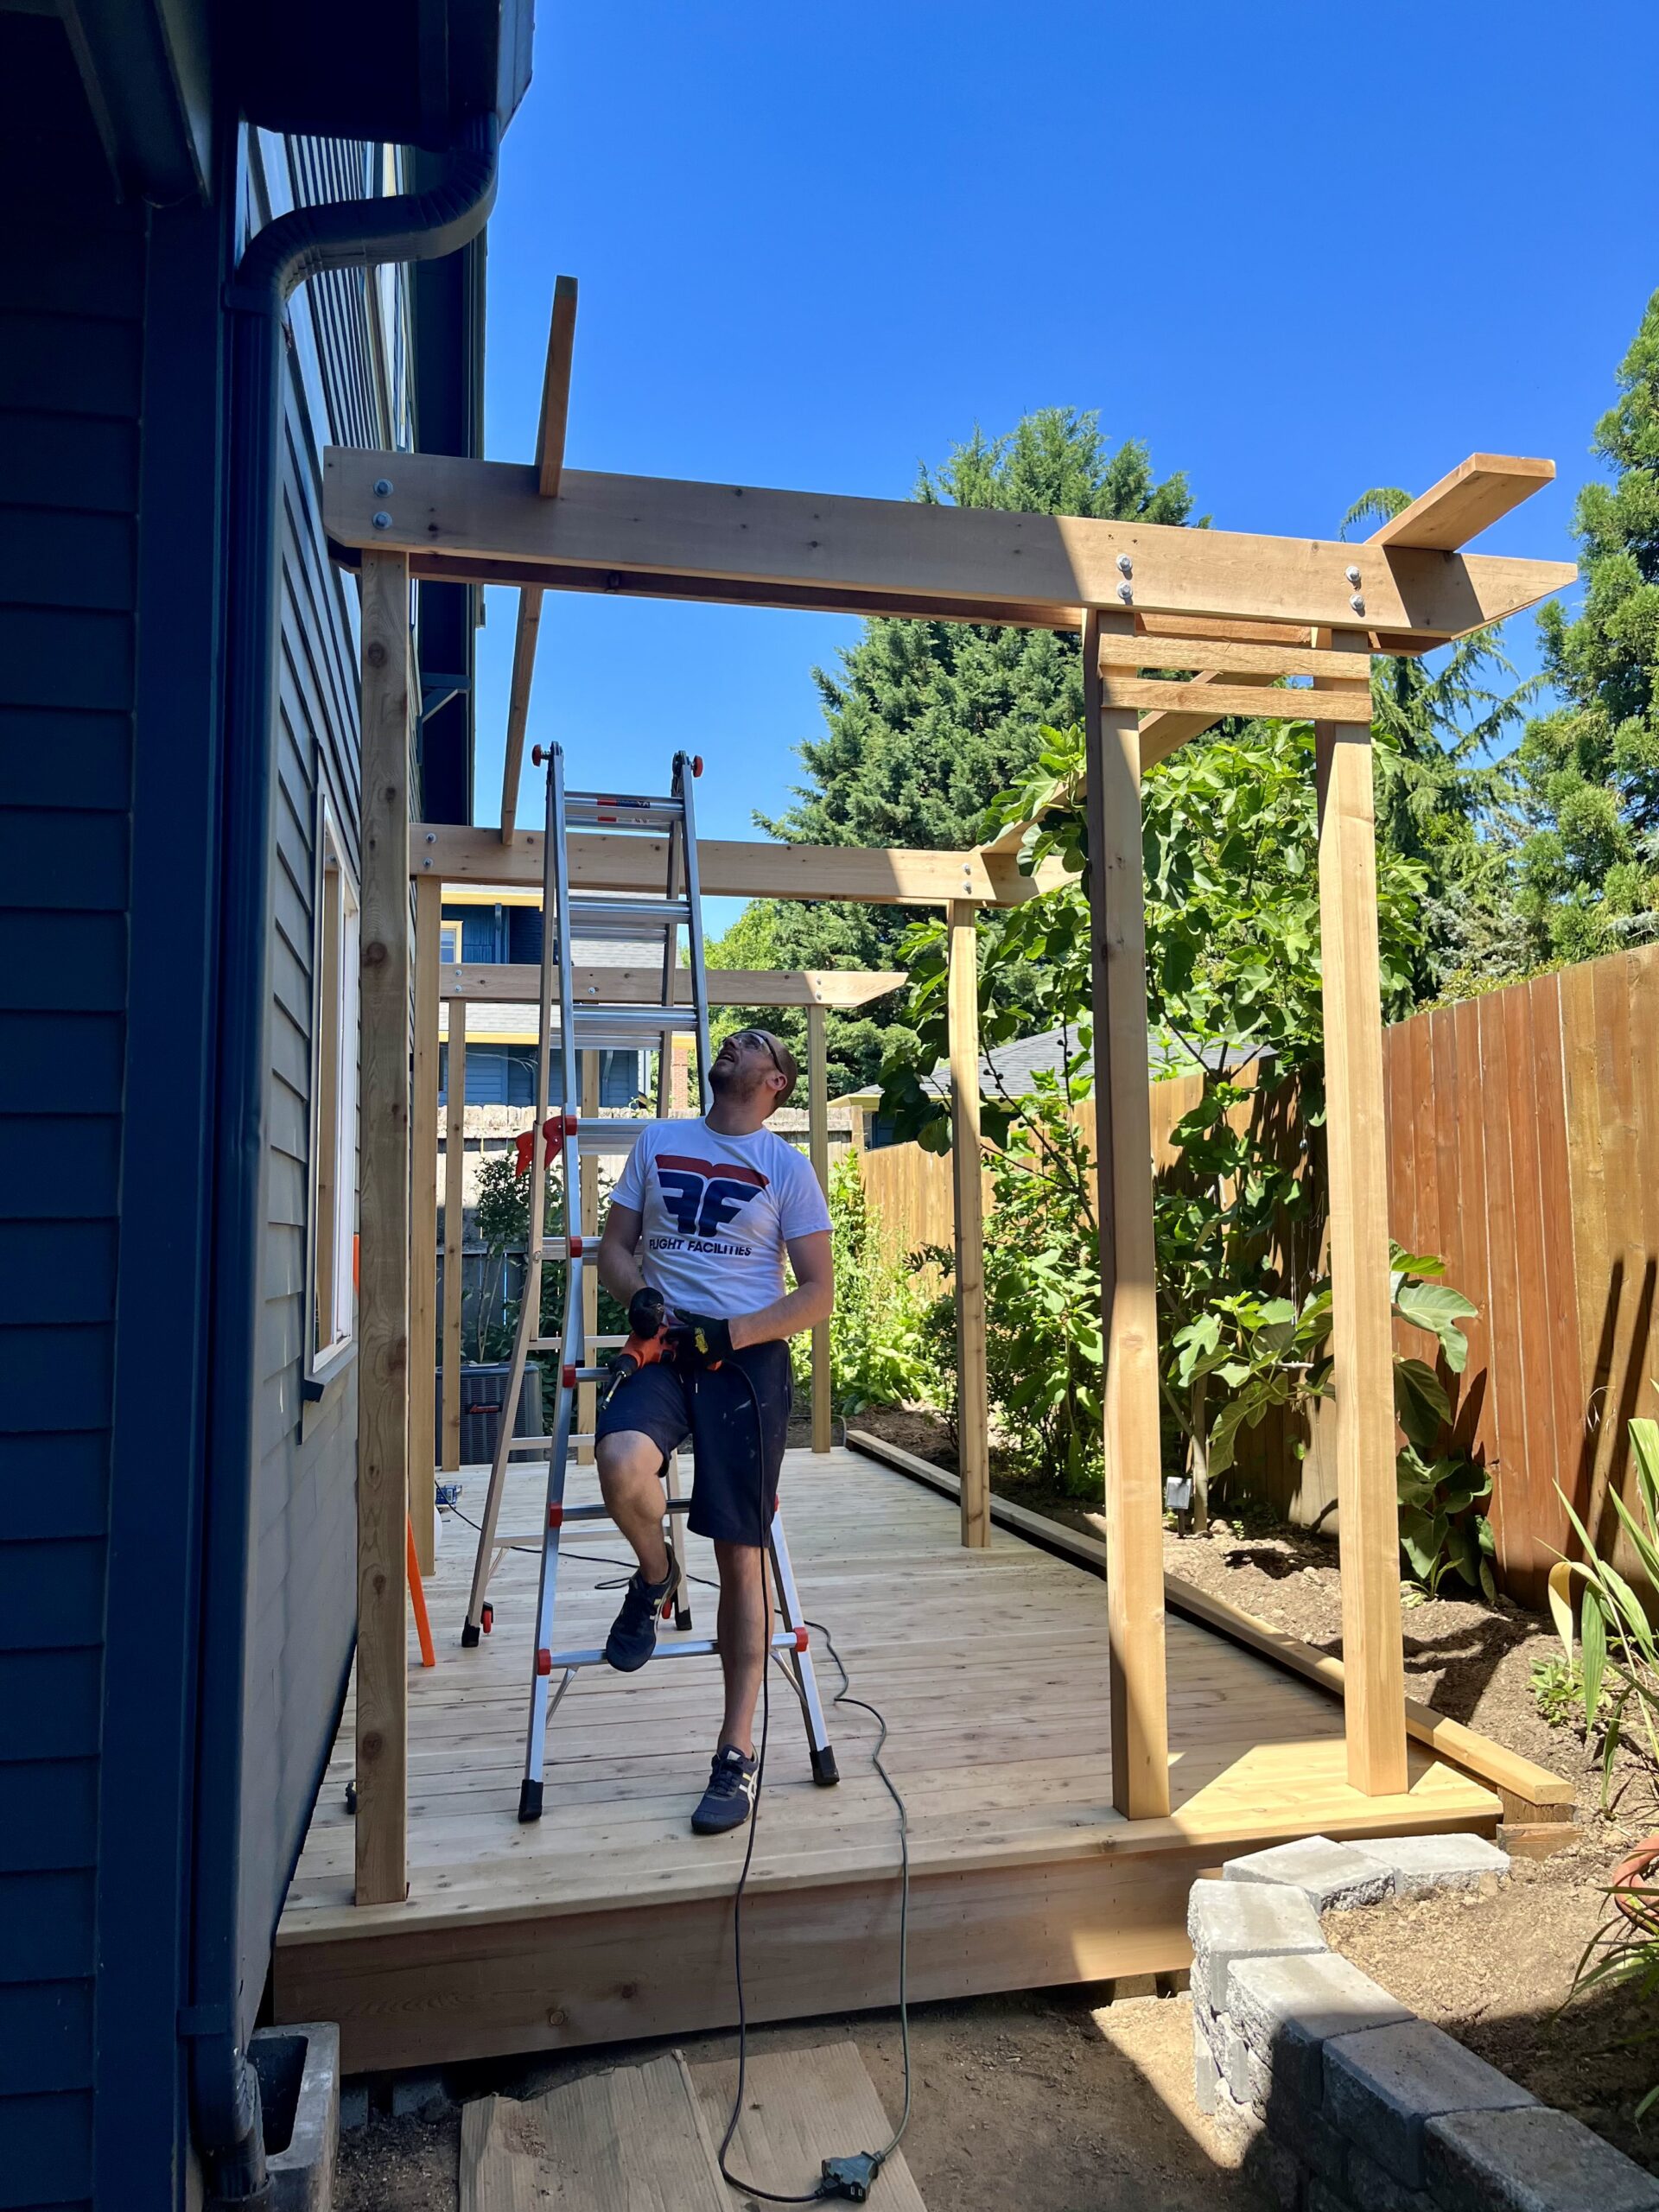
Now we have all the floor boards on. The cedar appearance board is tacked on the edge of the rim joist to hide the pressure treated lumber. The beams have been connected at the top of the columns. The start of a privacy wall is in place to see how it will fit together. Next up, all those rafters which I used some simple angle cuts and a multi-tool to extract pockets to interference-fit over the beams.

Lastly my wife did her design magic after gathering all the outdoor furniture together.
This year I have jasmine and honeysuckle doing it’s thing to hopefully start getting some of this pergola covered with leaves and flowers by summer. I also extended the privacy wall a bit more since this picture to have a lattice for the vines to climb.
That’s it!